How To Paint Stained Wood Doors White: Your Complete DIY Guide
Ever stared at those dark, outdated stained wood doors and thought, “There’s gotta be a better way”? Well, you’re in luck! Painting stained wood doors white is one of the most satisfying DIY projects you can tackle—and honestly, it’s way easier than most people think.
I’ve been there, standing in my hallway, feeling like those heavy wooden doors were making my entire home look dated. The good news? You don’t need to be a professional painter or spend a fortune on new doors. With the right approach and a weekend of work, you can completely transform your space.
Here’s what most people don’t realize: the secret isn’t in the painting itself—it’s all about the prep work. Skip the proper preparation, and you’ll end up with paint that chips, peels, or lets that old stain bleed right through (trust me, I learned this the hard way on my first attempt :/).
What You’ll Need: Gathering Your Arsenal
Before we dive in, let’s talk about what you’ll actually need for this project. Nothing’s worse than getting halfway through and realizing you’re missing something crucial!
Essential Materials:
- Sandpaper (120-grit and 220-grit)
- High-quality primer (Zinsser Bulls Eye 123 is my go-to)
- Acrylic latex paint (semi-gloss or gloss finish works best)
- Quality brushes (angled brush for details, flat brush for larger areas)
- Foam roller and roller covers
- Tack cloth for dust removal
- Wood filler (for any dings or holes)
- TSP cleaner or mild detergent
- Drop cloths or plastic sheeting
Safety Gear (Don’t Skip This!):
- Dust masks
- Safety goggles
- Nitrile gloves
- Long sleeves and pants
Pro Tip: Invest in quality brushes and rollers. Cheap tools will leave brush marks and lint in your finish, and nobody wants that after all this work!
Setting Up Your Workspace Like a Pro
Here’s something I wish someone had told me on my first door painting project: your setup can make or break this entire job. Take the time to do this right, and you’ll thank yourself later.
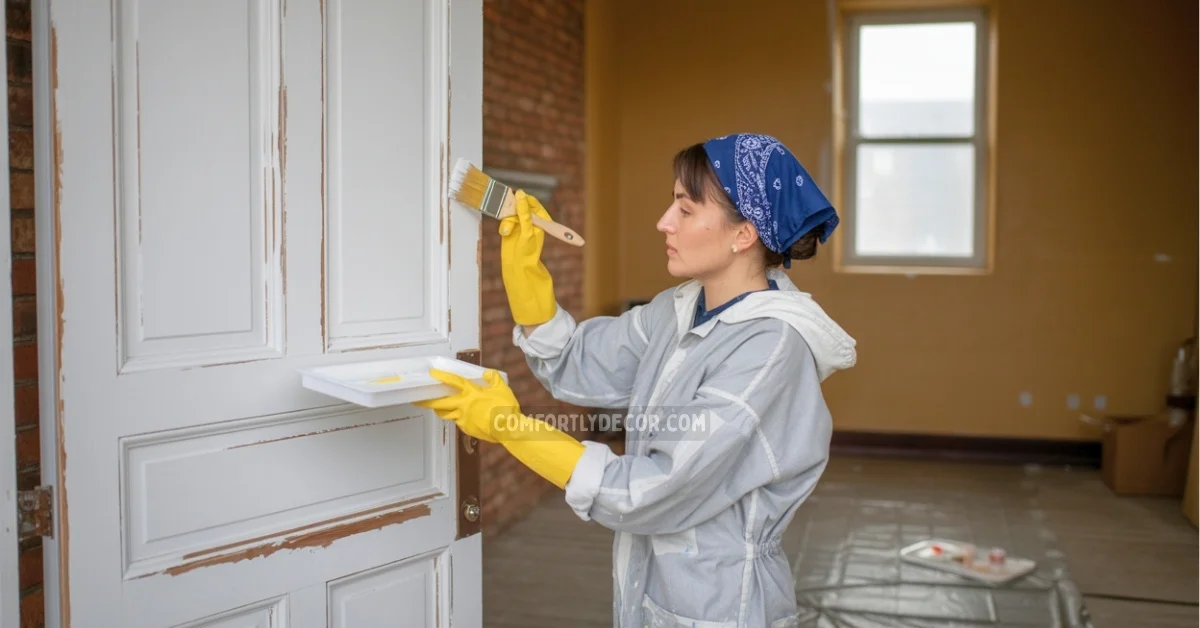
Remove the Door (If Possible):
Taking the door off its hinges makes everything easier. You can work at a comfortable height, get better access to all surfaces, and avoid drips on your floor. Plus, you won’t have to worry about paint fumes in your living space.
Create Your Paint Station:
Set up sawhorses with a piece of plywood, or use a sturdy table. Cover everything with drop cloths—and I mean everything. Paint has a sneaky way of getting places you never expected.
Lighting Matters:
Good lighting helps you spot imperfections and ensures even coverage. Set up work lights or move to a well-lit garage if possible.
Ventilation is Key:
Whether you’re working indoors or out, make sure you have proper airflow. Open windows, use fans, or work in a garage with the door open.
Step 1: Evaluating Your Door’s Current State
Before you start sanding away, take a good look at what you’re working with. Not all stained doors are created equal, and understanding your starting point will save you time and frustration.
What Type of Finish Are You Dealing With?
- Varnished doors have that glossy, protective coating
- Lacquered doors tend to be super smooth and shiny
- Shellacked doors might feel slightly sticky
- Oil-stained doors have soaked-in color without a topcoat
Run your hand over the surface. Does it feel smooth or textured? Are there any chips, scratches, or areas where the finish is peeling? Make note of these—they’ll need extra attention.
Damage Assessment:
Look for dents, scratches, or holes that need filling. Small imperfections are totally normal and easy to fix. Larger damage might require more extensive prep work, but don’t let that scare you off!
Step 2: The Deep Clean (Yes, It Really Matters)
I know, I know—cleaning isn’t the fun part. But here’s the thing: paint won’t stick to dirt, grease, or grime. Period.
Start with a Basic Clean:
Mix warm water with a few drops of dish soap. Wipe down the entire door, paying special attention to areas around handles and the bottom edge where dirt tends to accumulate.
For Stubborn Buildup:
If you’re dealing with years of accumulated grime (especially in kitchens), you might need something stronger. TSP (trisodium phosphate) is your friend here. Mix according to package directions and scrub gently.
Don’t Forget the Details:
Those recessed panels and decorative edges love to collect dust and debris. Use an old toothbrush to get into all the nooks and crannies.
Final Rinse and Dry:
Wipe everything down with clean water to remove any cleaning residue, then let the door dry completely before moving to the next step.
Step 3: Sanding—The Make-or-Break Step
Here’s where we separate the pros from the amateurs. Proper sanding is what makes the difference between a paint job that lasts years and one that starts chipping in months.
Why Sanding Matters:
That glossy finish on your stained door? It’s basically a barrier that prevents paint from sticking. Sanding creates tiny scratches that give the primer something to grab onto.
Start with 120-Grit:
This medium-grit sandpaper removes the glossy finish without being too aggressive. Sand with the grain—never against it. Going against the grain creates scratches that’ll show through your paint.
Focus Areas:
- Flat panels need even, consistent sanding
- Raised areas and edges require hand-sanding (no shortcuts here!)
- Don’t forget the door frame if you’re painting that too
Switch to 220-Grit:
Once you’ve dulled the entire surface with 120-grit, switch to 220-grit for a smooth finish. This finer sandpaper removes any scratches left by the coarser paper.
The Feel Test:
Run your hand over the surface. It should feel uniformly smooth with no glossy spots remaining. If you find any, hit them with more 120-grit sandpaper.
Clean Up:
Use a tack cloth or vacuum to remove every speck of dust. Seriously—dust under paint looks terrible and can cause adhesion problems.
Step 4: Filling Imperfections
Now’s the time to address any dings, scratches, or holes you found during your assessment. This step separates a good paint job from a great one.
Choose the Right Filler:
For small holes and scratches, any quality wood filler will do. For larger damage, you might need something more substantial like Bondo or two-part wood filler.
Application Technique:
Apply the filler with a putty knife, slightly overfilling each imperfection. The filler will shrink as it dries, so it’s better to have too much than too little.
Sand When Dry:
Once the filler is completely dry (check the label for timing), sand it flush with the surrounding surface using 220-grit sandpaper.
Check Your Work:
Run your hand over the filled areas. They should feel perfectly smooth and level with the rest of the door.
Step 5: Priming—Your Paint’s Best Friend
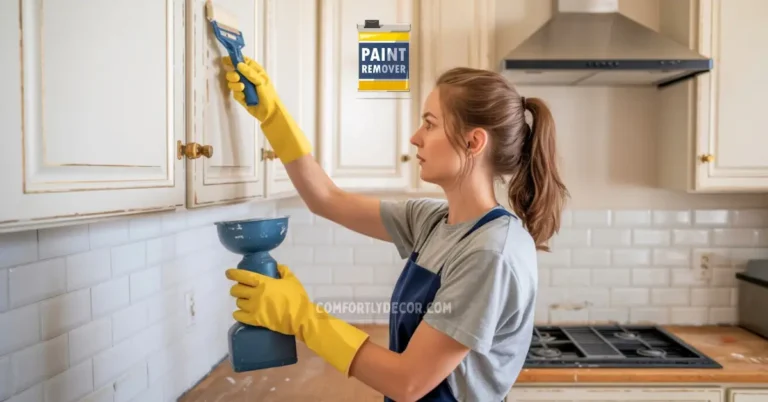
If there’s one step you absolutely cannot skip, it’s priming. This is especially crucial when painting over stained wood because that stain will bleed through regular paint if you don’t block it properly.
Why Stain-Blocking Primer Is Essential:
Regular primer won’t cut it here. You need a product specifically designed to block stains and tannins from bleeding through. Zinsser Bulls Eye 123 and BIN are both excellent choices.
Application Tips:
- Start with details first: Use an angled brush to get into all the recessed areas and edges
- Then roll the flat surfaces: A foam roller gives the smoothest finish
- Work in sections: Don’t try to do the entire door at once
- Maintain a wet edge: This prevents lap marks and ensures even coverage
Drying Time:
Let the primer dry completely according to the manufacturer’s instructions. Don’t rush this—patience here pays off with a better final result.
Light Sanding Between Coats:
If you’re applying two coats of primer (recommended for heavily stained doors), lightly sand between coats with 220-grit sandpaper and clean with a tack cloth.
Step 6: Painting Like a Professional
Finally! Time for the fun part. But don’t get too excited and rush through this—good technique here makes all the difference.
Choose the Right Paint:
Acrylic latex paint is your best bet for interior doors. It’s durable, easy to clean, and dries to a beautiful finish. Semi-gloss or gloss finishes work best for doors because they’re more durable and easier to clean.
The Right Tools for the Job:
- High-quality angled brush for detailed work
- Foam roller for smooth, flat surfaces
- Small detail brush for tight spots
Painting Technique:
- Start with the details: Paint all the recessed areas and edges first with your angled brush
- Roll the flat areas: Use long, smooth strokes with your foam roller
- Back-brush if needed: Lightly brush over rolled areas to eliminate any texture
- Work quickly: Maintain that wet edge to avoid lap marks
Multiple Thin Coats vs. One Thick Coat: Always go with multiple thin coats. They dry more evenly, look smoother, and last longer. Plan on at least two coats, possibly three for full coverage.
Between Coats: Lightly sand with 320-grit sandpaper between coats if you want an ultra-smooth finish. Clean with a tack cloth before applying the next coat.
Step 7: Dealing with Tricky Areas
Every door has those challenging spots that make you want to throw in the towel. Here’s how to handle them like a pro.
Panel Doors:
Start with the recessed panels, then do the horizontal rails, and finish with the vertical stiles. This order prevents drips and ensures even coverage.
Raised Panels:
Use your angled brush to cut in around the raised areas first, then carefully roll or brush the flat surfaces. Take your time here—rushing leads to drips.
Hardware Areas:
If you’re painting around hinges or other hardware, use painter’s tape to protect them. Remove the tape while the paint is still slightly wet to avoid peeling.
Step 8: The Final Inspection and Touch-Ups
You’re almost done! But before you call it a day, take a critical look at your work.
What to Look For:
- Missed spots: They’re more common than you think
- Drips or sags: Sand these out and touch up
- Uneven coverage: Might need another coat in some areas
- Brush marks: Light sanding and another coat usually fixes this
Touch-Up Strategy:
For small areas, feather the paint into the surrounding area. For larger touch-ups, you might need to repaint entire sections to avoid obvious patches.
Maintenance: Keeping Your Doors Looking Fresh
Congratulations! You’ve got gorgeous white doors. Now let’s keep them that way.
1. Regular Cleaning: Dust weekly with a soft cloth. For deeper cleaning, use mild soap and water, then dry immediately.
2. Touch-Up Kit: Keep some leftover paint for future touch-ups. Small chips and scratches are inevitable, but they’re easy to fix if you catch them early.
3. When to Repaint: With proper care, your paint job should last 5-7 years in normal conditions. High-traffic areas might need attention sooner.
Common Mistakes (And How to Avoid Them)
Let me save you some headaches by sharing the mistakes I see most often:
- Skipping the primer: I cannot stress this enough—you NEED stain-blocking primer when painting over stained wood.
- Using cheap brushes: They leave marks and shed bristles. Invest in quality tools.
- Not cleaning properly: Paint won’t stick to dirty surfaces.
- Rushing between coats: Let each coat dry completely before applying the next.
- Ignoring the weather: High humidity can cause problems with drying and adhesion.
FAQs
Wrapping Up Your Transformation
There you have it—everything you need to transform those dated stained doors into fresh, modern white beauties. The key is taking your time with the prep work and not rushing the process.
IMO, this is one of the most satisfying DIY projects you can tackle. The transformation is dramatic, the cost is minimal, and the sense of accomplishment is huge. Plus, every time you walk through that freshly painted door, you’ll get a little boost of pride knowing you did it yourself.
Remember, perfection isn’t the goal—improvement is. Even if your first attempt isn’t magazine-perfect, it’s still going to look a thousand times better than those old stained doors.
Now stop reading and start painting! Your home is waiting for its fresh new look.

I am Mindy Medford, a home décor, paint, and design specialist with over a decade of hands-on experience transforming ordinary spaces into cozy, personality-packed havens. Since 2013, I have been helping homeowners discover the art of beautiful yet practical design. I share my love for color, texture, and layout—making stylish interiors & exteriors feel achievable for everyone. Whether it’s picking the perfect paint shade or reimagining a small space, I’m here to guide and inspire.