How to Hang Christmas Lights Outside Without Turning It Into A Winter Disaster
Every December, I find myself out in the cold, one hand frozen to a strand of lights, the other trying to untangle what looks like a glowing knot of chaos. Hanging Christmas lights outside can turn from “festive fun” to “why did I agree to this again?” real fast. But over time, I have learned a few tricks that make it simple, safe, and actually… kinda enjoyable.
If you want your home to sparkle without electrocuting yourself or ending up in a ball of frustration, here is how I do it every year—step by step.
Step 1: Start With a Plan (and Maybe a Cup of Coffee)
Before I touch a single light, I plan out everything. Nothing ruins the mood faster than realizing you ran out of lights halfway through your roofline.
- Walk around your house and decide what to highlight—the roof, windows, porch, trees, or walkway.
- Measure those areas so you know exactly how many feet of lights you need.
- Check your outlets and make sure they are GFCI-protected (because rain and electricity are not friends).
I usually sketch a rough layout. It is not art, but it saves me from last-minute “oh no” moments.
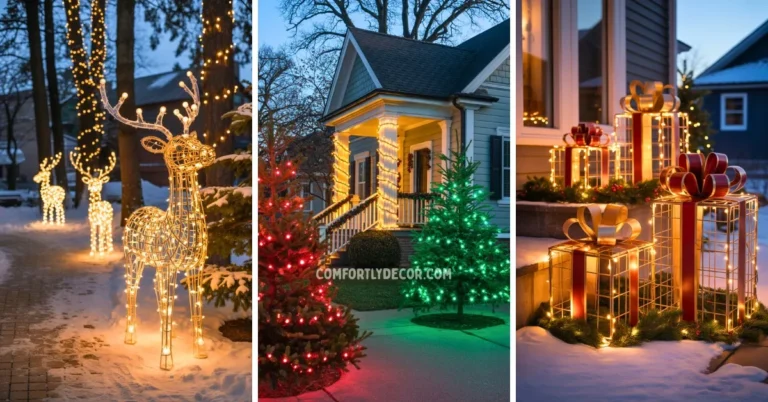
Step 2: Pick the Right Type of Lights
Not all Christmas lights are created equal. Trust me, I learned this the hard way when half my “outdoor” lights fizzled out in the first drizzle.
- LED lights (string lights) are energy-efficient, long-lasting, and stay cool to the touch.
- Incandescent lights have that warm glow but use more power and do not last as long.
- For a modern touch, net lights and icicle lights look stunning on bushes and eaves.
- Always double-check the box for “rated for outdoor use.”
FYI, using indoor lights outside is basically asking for trouble. Do not do it.
Step 3: Gather the Right Tools Before You Start
If you think you can wing it with a chair and a roll of tape, please—do yourself a favor and grab the right gear. You will thank me later.
You will need:
- A sturdy ladder (not your dining chair, please).
- Light clips (they grip onto gutters and shingles without damage).
- Outdoor extension cords and timers.
- A measuring tape or ruler to space the lights evenly.
And for the love of Christmas, test the lights before you hang them. There is nothing worse than hanging a full strand and realizing half the bulbs are dead.
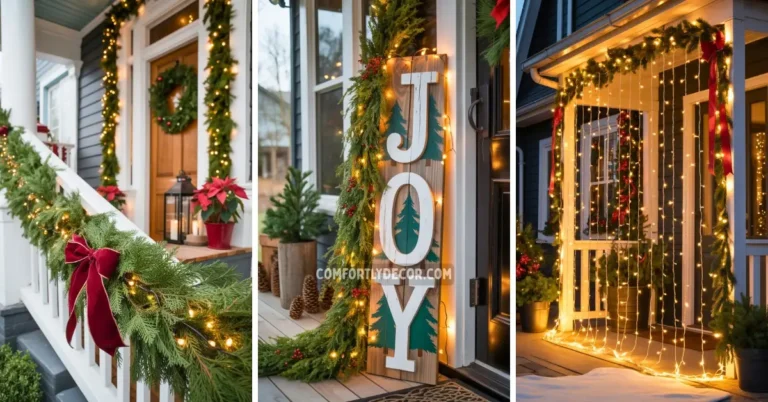
Step 4: Hang Your Lights Like a Pro
Now comes the main event. I always start from the outlet end so I do not end up one plug short at the end (been there, hated it).
- Attach the first light to your clip, starting at one end of the roofline or gutter.
- Work your way along, spacing the clips evenly (usually every 12 inches).
- Keep the strand taut but not stretched—it should rest gently against the clips.
- For trees or bushes, wrap lights loosely in a spiral or drape them for a natural flow.
Want that picture-perfect look? Step back every few feet to check spacing. It saves time later when you are not climbing up and down fifty times.
Step 5: Power Up and Add the Finishing Touches
Once everything is up, plug it in and take a moment. This is either the “wow” moment or the “why is half of it not working?” moment. If it is the latter, breathe—it is usually a loose connection.
Use a timer or smart plug so the lights turn on automatically at dusk. It makes life easier, and you get that satisfying glow every night without lifting a finger.
I also love adding pathway stakes or solar-powered accents to give the yard some depth. It ties everything together like a glowing Christmas movie scene—minus the fake snow.
A Few Pro Tips From Years of Trial and Error
- Always work in daylight. Hanging lights at night sounds festive until you miss a shingle and nearly fall off the roof.
Secure extra wire with zip ties instead of taping it—it looks cleaner and lasts longer. - Label each strand before packing them away for next year. Future-you will appreciate that more than you can imagine.
FAQs
Lighting Up the Neighborhood (The Right Way)
Once you have your lights glowing perfectly, take a minute to admire the view. It is not just about the decoration—it is about the feeling. There is something magical about standing outside in the cold, seeing your home sparkle. It makes the whole holiday chaos worth it.
So grab your coat, step back, and enjoy your masterpiece. You earned that cup of hot chocolate.

I am Mindy Medford, a home décor, paint, and design specialist with over a decade of hands-on experience transforming ordinary spaces into cozy, personality-packed havens. Since 2013, I have been helping homeowners discover the art of beautiful yet practical design. I share my love for color, texture, and layout—making stylish interiors & exteriors feel achievable for everyone. Whether it’s picking the perfect paint shade or reimagining a small space, I’m here to guide and inspire.