How to Style Kitchen Countertops: Easy Tips That Actually Work
Mostly kitchen countertops are like the stage of culinary theater, that is a reality. They are the first thing people notice when they walk into your kitchen, and honestly? They can make or break the entire vibe of your space.
I have seen too many gorgeous kitchens ruined by cluttered countertops that look like a tornado hit them. On the flip side, I have also witnessed beautiful counters that look so sterile you would think nobody actually cooks there. Finding that sweet spot between functional and fabulous? That is where the magic happens.
The good news is that kitchen countertop styling does not require a design degree or a massive budget. With a few simple tricks and the right mindset, you can transform your counters from chaotic to chic in an afternoon. Trust me, I have been there, done that, and learned from plenty of styling mistakes along the way.
What You’ll Actually Need (No Designer Price Tags Required)
Before we jump into the fun stuff, let’s talk about the essentials. You don’t need to raid Williams Sonoma or blow your grocery budget on fancy décor. Here’s what actually works:
The Basics:
- Decorative trays or cutting boards (wood, marble, or ceramic work great)
- Small plants or fresh flowers (even fake ones if you’re plant-challenged like I used to be 🙂 )
- A few beautiful cookbooks (the ones you actually use, not just for show)
- Stylish storage jars or bowls (mason jars count, people!)
- One or two statement appliances (your coffee maker can be décor too)
The key here is choosing items that pull double duty. Everything on your counter should either be beautiful, functional, or ideally both. No exceptions.
The Step-by-Step Game Plan
Step 1: The Great Counter Purge
First things first—clear everything off your counters. And I mean everything. That random stack of mail? Gone. The fourteen coffee mugs you’ve been meaning to put away? Sayonara.
This might feel scary (what if you forget where you put things?), but trust the process. You can’t style what you can’t see, and chances are, half the stuff cluttering your counters doesn’t belong there anyway.
Step 2: Pick Your Focal Zone
Every well-styled counter needs a hero area—a spot that draws the eye and anchors the whole look. Maybe it’s a gorgeous cutting board display, a cozy coffee station, or an artfully arranged collection of everyday essentials.
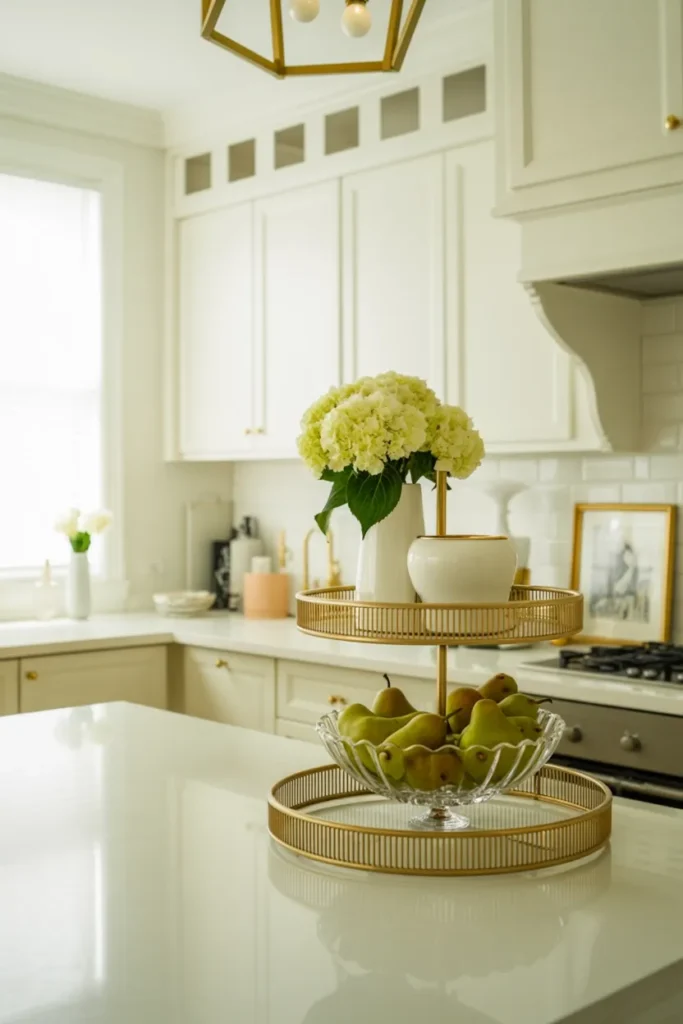
I personally love creating a coffee bar zone because, let’s face it, coffee is life. But maybe you’re more of a baking enthusiast, or you want to showcase that gorgeous fruit bowl your grandmother gave you. Whatever speaks to you, make it the star.
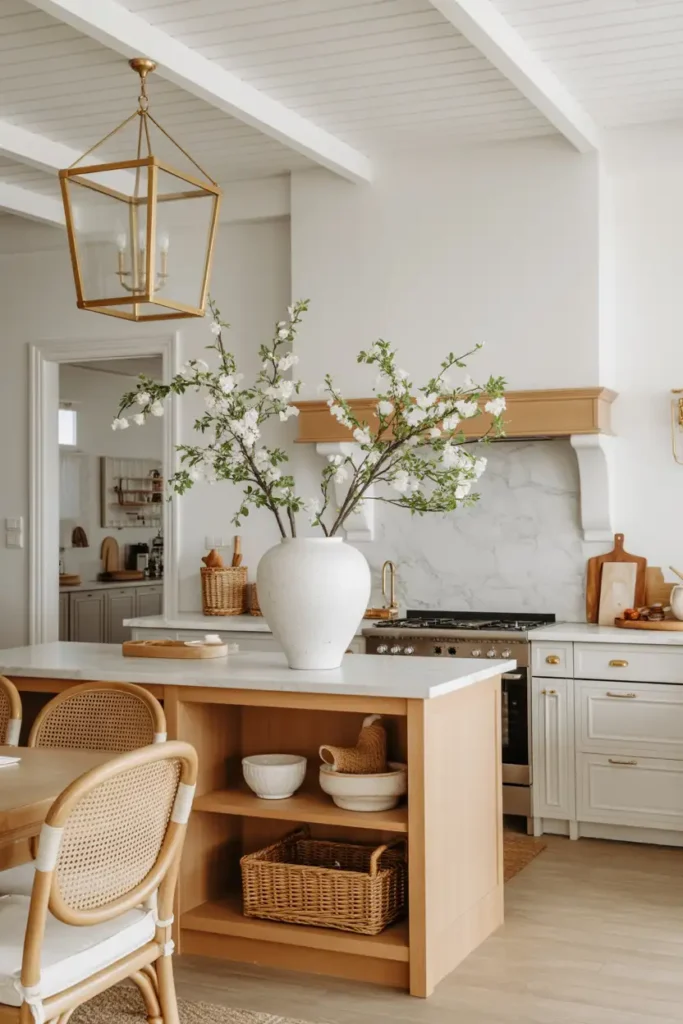
Step 3: Master the Art of Height Variation
Flat surfaces + items all the same height = boring city. You want your eye to dance around the space, not fall asleep looking at it.
Here’s how I create visual interest:
- Stack cutting boards at different angles
- Use tall vases or bottles next to shorter bowls
- Layer books under decorative objects
- Mix standing items with things that naturally sit low
Think of it like creating a skyline—you want peaks and valleys, not a flat horizon line.
Step 4: The Magic of Threes
This isn’t just design school nonsense—grouping items in odd numbers (especially threes) really does look better to our brains. I can’t explain the psychology behind it, but I can tell you it works.
Try clustering three different-sized jars, or arranging a small plant, a candle, and a pretty spoon rest together. The key is varying the heights and textures within each group.
Step 5: Texture Is Everything
A counter styled entirely in one material looks… flat. Mix things up with different textures and finishes:
- Ceramic bowls next to wooden cutting boards
- Glass jars alongside metal canisters
- Marble accessories paired with woven baskets
The contrast keeps things interesting and prevents that matchy-matchy showroom look that screams “nobody actually lives here.”
Step 6: Add Your Personal Touch
This is where your personality shines through. Maybe it’s that vintage cookbook you inherited from your mom, a quirky salt cellar you picked up on vacation, or a candle in your favorite scent.
These personal elements are what transform a styled space from “nice” to “home.” Don’t skip this step—it’s what makes your kitchen uniquely yours.
Pro Tips That Actually Make a Difference
Keep the Everyday Stuff Accessible
Your countertop styling shouldn’t make cooking harder. Keep the things you use daily—salt, olive oil, cutting boards—within easy reach but styled intentionally.
I keep my most-used items in a beautiful wooden tray near the stove. It looks intentional, but I can grab what I need without disturbing the whole display.
Swap Things Seasonally
This is probably my favorite kitchen styling tip—changing out a few accessories with the seasons keeps your space feeling fresh without a complete overhaul.
Summer might call for fresh herbs and bright ceramics, while fall begs for warm wooden accessories and small pumpkins. It’s like giving your kitchen a mini-makeover four times a year.
Embrace Functional Décor
The best countertop styling pieces work double duty. Pretty canisters can store flour and sugar. A gorgeous fruit bowl keeps produce fresh and accessible. A stylish utensil holder keeps tools organized.
When everything serves a purpose, you’re less likely to end up with clutter creeping back in.
Mistakes I See (and Have Made) All the Time
Overcrowding the Space
I get it—you found all these gorgeous accessories and you want to use them all. But cramming everything onto your counters just creates visual chaos. Less really is more when it comes to counter styling.
Leave some breathing room between groupings. Your counters need negative space to look intentional rather than cluttered.
Ignoring Scale and Proportion
A tiny decorative bowl on a massive kitchen island looks lost. Conversely, oversized accessories can overwhelm a small galley kitchen counter.
Match your décor to the scale of your space. When in doubt, go slightly larger rather than smaller—it’ll have more visual impact.
Too Many Colors Going On
I’m all for personality in design, but a rainbow explosion on your counters isn’t the vibe we’re going for. Stick to a cohesive color palette—maybe three colors max—to keep things looking intentional.
Styling Small vs. Large Countertops
Small Countertops (Under 4 feet)
With limited real estate, every item needs to earn its place. Focus on:
- One focal point rather than multiple groupings
- Vertical storage solutions that don’t eat up precious prep space
- Multi-functional pieces that serve multiple purposes
Think quality over quantity. A few beautiful, useful items will always look better than a bunch of tiny decorative objects.
Large Countertops (Over 6 feet)
Lucky you! With more space comes more styling opportunities, but also more ways to mess it up. Here’s what works:
- Create multiple vignettes rather than one central display
- Use larger-scale accessories that won’t get lost in all that space
- Leave generous negative space between groupings
The key is creating intentional zones rather than spreading items evenly across the entire surface like you’re buttering toast.
FAQs
Your Beautiful, Practical Counter Awaits
Look, how to style kitchen countertops doesn’t have to be rocket science or require an Instagram-worthy budget. It’s about finding that sweet spot where beauty meets function—where your counters look intentional and gorgeous, but you can still cook dinner without moving a museum’s worth of décor.
The best part? Once you nail this balance, maintaining it becomes second nature. You’ll start automatically grouping items in threes, choosing functional pieces that happen to be gorgeous, and keeping clutter at bay because you actually like how your counters look.
Your kitchen is the heart of your home, and your countertops are its crown jewel. Give them the styling love they deserve—your morning coffee routine (and your dinner guests) will thank you.

I am Mindy Medford, a home décor, paint, and design specialist with over a decade of hands-on experience transforming ordinary spaces into cozy, personality-packed havens. Since 2013, I have been helping homeowners discover the art of beautiful yet practical design. I share my love for color, texture, and layout—making stylish interiors & exteriors feel achievable for everyone. Whether it’s picking the perfect paint shade or reimagining a small space, I’m here to guide and inspire.