How To Stain Brick Exterior
Thinking about changing up your brick exterior? I get it. That old red brick can feel a little dated. Before you grab a bucket of paint, let me offer a better idea. I am talking about staining. It is the secret weapon for a brick refresh that looks amazing and lasts.
So why stain brick instead of painting it? Paint sits on top of the brick like a thick coat. It covers up that beautiful natural texture and can trap moisture. Trapped moisture leads to peeling, chipping, and a whole lot of future headaches. Stain, on the other hand, soaks into the brick. It changes the color but lets the original texture shine through. It also lets the brick breathe, which is super important for its long term health.
Step 1: Confirm Your Brick Is Stainable
First things first. You need to figure out if your brick can even take a stain. Some brick has a sealant or coating that will block the stain from absorbing.
How can you tell? A simple water test will do the trick. Just spray a bit of water on the brick. If the water beads up and runs off, you probably have a sealant. If the brick darkens and absorbs the water, you are good to go.
Step 2: Choose the Right Type of Stain
Now for the fun part. Choosing your stain. You will find a few types out there, but I have my favorites.
- Mineral stains are fantastic because they create a chemical bond with the brick. This makes them incredibly durable and natural looking.
- Acrylic stains are more like a thin paint and can look a bit artificial.
- Penetrating stains are also a solid choice as they soak deep into the brick.
For the most natural and long lasting finish, I always lean towards mineral stains.
When it comes to color, try to stay close to natural brick tones. Think earthy reds, browns, tans, or even grays. A color that is too wild might look out of place. Remember, you want to enhance the brick, not completely hide it.
Step 3: Clean and Prep the Brick
You would not paint on a dirty canvas, right? The same idea applies here. Your brick needs a good cleaning before you stain.
A power washer is your best friend for this job. Keep the pressure setting low, around 1500 PSI, to avoid damaging the brick or mortar. You want to clean it, not blast it into another dimension.
While you are cleaning, look for any damaged mortar and repair it. Also, check for efflorescence. That is the white, salty powder that can form on brick. A stiff brush and some water will usually get rid of it.
Step 4: Protect Everything Else
Overspray is the enemy of a clean stain job. Before you start, take the time to protect your windows, doors, light fixtures, and landscaping.
Use plastic sheeting and painter’s tape to cover everything you do not want stained. Lay down tarps on the ground to catch any drips. A little prep work here saves a lot of cleanup later. Trust me on this one.
Step 5: Test Stain Swatches
I cannot stress this enough. Always test your stain color before you commit to the whole wall. Pick a few hidden spots, one in a sunny area and one in a shady area.
Apply the stain and let it dry completely. Colors can look very different depending on the light.
This step lets you see exactly how the color will turn out. If the color is too dark, you can dilute the stain with water. If it is too light, you can add another coat.
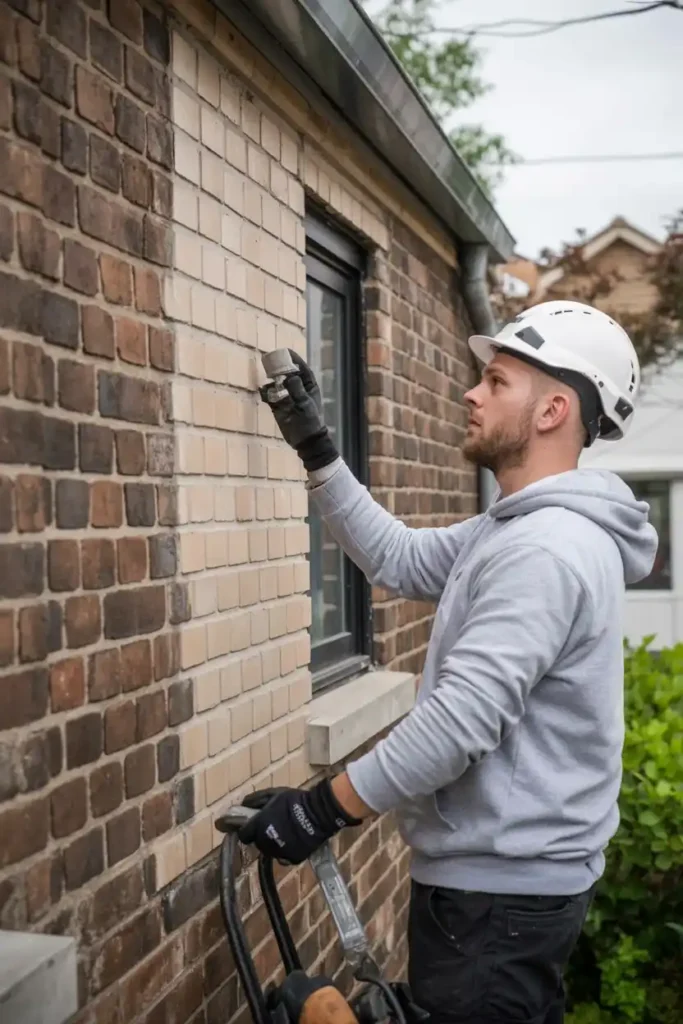
Step 6: Apply the Stain
You have three main options for applying the stain. A brush, a roller, or a sprayer. A brush is great for small areas and cutting in. A roller works well for flat surfaces but can be slow.
For a big brick exterior job, a pump sprayer is the way to go. It is fast and gives you even coverage. After spraying a section, I always go back over it with a brush. This is called back brushing.
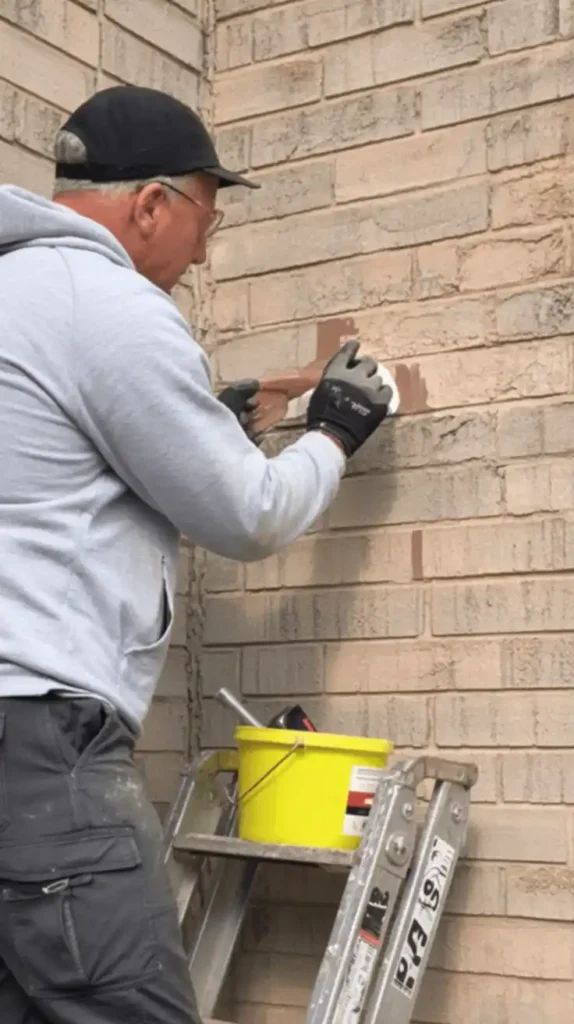
It helps work the stain into the brick and gets rid of any drips for a perfect finish. Let the first coat dry completely before deciding if you need a second.
Step 7: Seal or Leave Natural
To seal or not to seal, that is the question. Most high quality mineral stains do not need a sealer. They are breathable and durable on their own.
In some cases, a sealer can add extra protection. If you do decide to seal, please avoid acrylic sealers. They will trap moisture and defeat the purpose of using a breathable stain in the first place.
A breathable, silane or siloxane based sealer is a much better option if you feel you need one.
What to Avoid When Staining Brick
I have seen a few DIY projects go wrong. Here are some common mistakes to avoid.
- Do not stain cracked brick: Repair any structural issues before you even think about staining.
- Avoid opaque stains: You want to see the brick’s texture. If your stain looks like paint, it is too heavy.
- Do not skip the color test: Seriously. Testing the color in different lighting conditions is crucial.
Budget and Time for Your Project
So what is this all going to cost? Doing it yourself will obviously save you a lot of money. You will need to buy the stain, a power washer, a sprayer, brushes, and protective gear.
- I would budget anywhere from $500 to $1500 for materials depending on the size of your house.
- Hiring a pro will cost significantly more, likely in the $3000 to $7000 range.
- As for time, plan for a full weekend or two. One weekend for prep and cleaning, and another for the actual staining.
A Lasting and Beautiful Finish
Staining your brick exterior is a fantastic way to update your home’s look. It gives you a fresh color while keeping the natural beauty and texture of the brick.
Plus, it is a low maintenance solution that will not peel or chip like paint. It is a DIY project that delivers a huge impact, giving you a home you can be proud of for years.
FAQs

I am Mindy Medford, a home décor, paint, and design specialist with over a decade of hands-on experience transforming ordinary spaces into cozy, personality-packed havens. Since 2013, I have been helping homeowners discover the art of beautiful yet practical design. I share my love for color, texture, and layout—making stylish interiors & exteriors feel achievable for everyone. Whether it’s picking the perfect paint shade or reimagining a small space, I’m here to guide and inspire.