How To Remove Carpet From Stairs
So you have decided it is time for that old stair carpet to go. I get it. Maybe it has seen better days, or perhaps you are just dreaming of the beautiful wood hiding underneath. Whatever the reason, ripping out stair carpet is a project I have tackled myself, and it is totally doable. It might even be a little bit fun. Ready to see what you find? Let us get this done.
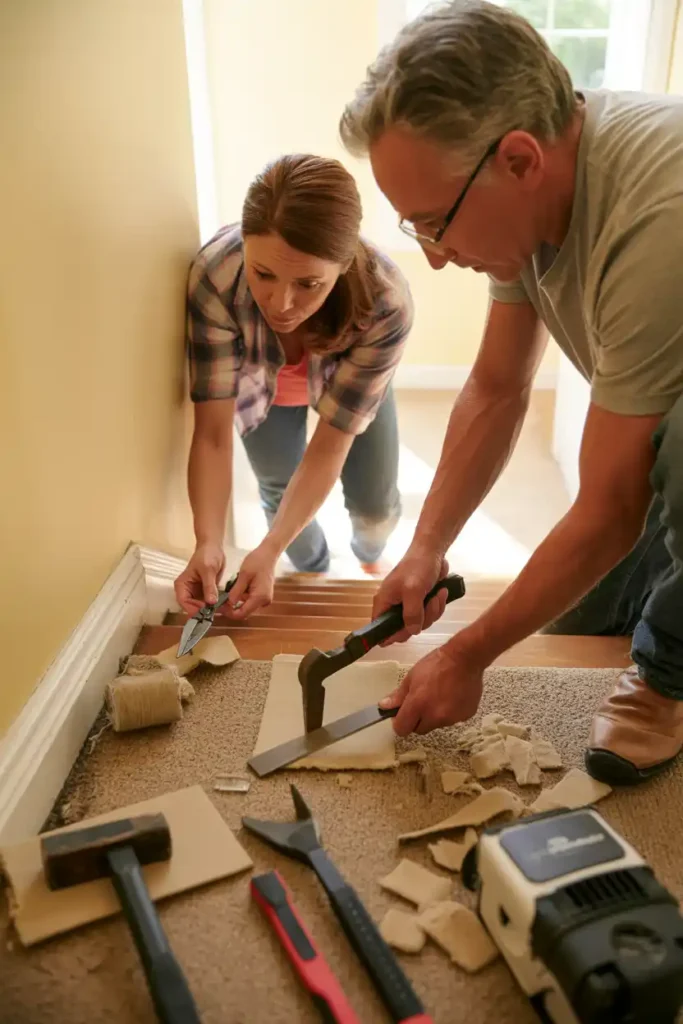
First Things First Your Toolbox
Before I start any project, I like to have all my tools ready. There is nothing worse than getting halfway through and realizing you need to stop and find something. It just kills the momentum.
For this job, you will want to grab a few key items. Trust me, having these on hand will make everything go so much smoother. A little preparation goes a long way.
The Essentials
- Pliers: A good pair of needle nose pliers is your best friend here. I use them for pulling out all those tiny staples.
- Utility Knife: A sharp knife is crucial for cutting the carpet into manageable sections. Just be careful with it.
- Work Gloves: I cannot stress this enough. Get a sturdy pair of gloves to protect your hands from sharp tack strips and rogue staples.
- Scraper: A metal scraper helps a lot with any stubborn glue or padding that does not want to come up easily.
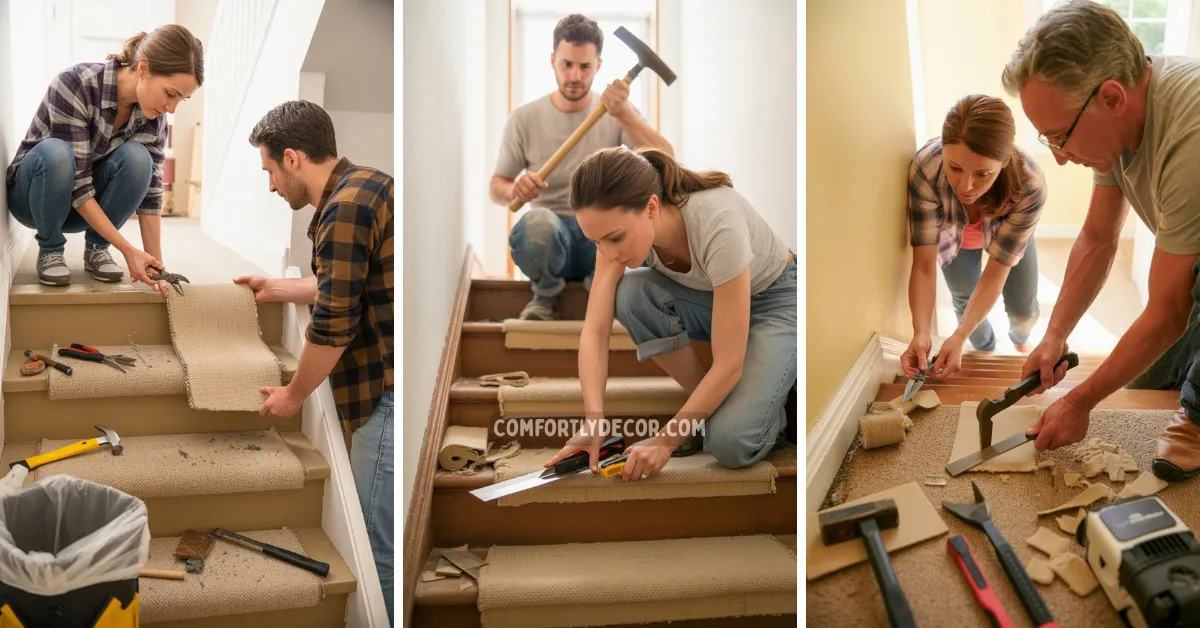
Removing That Old Carpet
Alright, tool belt on? Let us get to the fun part. I always start at the top of the stairs and work my way down. It just feels more logical, and you are not tripping over the carpet you have already pulled up.
This is where the real work begins, but seeing the progress step by step is super satisfying. It is like unwrapping a present.
Start Pulling
I grab a corner of the carpet on the top step with my pliers and give it a good yank. Once you get a section loose, the rest usually comes up without too much of a fight.
If it is really stuck, I use my utility knife to cut a line along the edge of the step. Then I can pull the carpet up in smaller, more manageable pieces.
Tack Strips and Staples
After the carpet is gone, you will see the tack strips along the edges and probably a million staples. This part is a bit tedious, but it is necessary.
I use my pliers to carefully pry up the tack strips. Then I go on a staple hunt. I find it helps to put on some music and just get into a rhythm. It is a treasure hunt, except the treasure is a clean, staple free stair.
Inspect the Wood
Now for the moment of truth. What does the wood underneath look like? Sometimes you get lucky and find beautiful hardwood that just needs a little love.
Other times, well, it might be a different story. I have seen it all. But do not worry, no matter the condition, there is always a path forward. This is just the starting point for your new beautiful staircase.
Prep for a New Look
Once all the old stuff is gone, I give the stairs a good cleaning. Then I decide on the next step.
Am I going to refinish the wood to show off its natural beauty, or am I going to paint it for a fresh, modern look? Both are great options. The choice really depends on the condition of the wood and the style I am going for.
Prepping Stairs After Carpet Removal
So the carpet is gone. What now? Before you can get to the exciting part of painting or refinishing, there is a little prep work to do. This stage is super important for getting that professional looking finish.
I know it is tempting to skip ahead, but taking the time here will make a huge difference in the final result. You will thank me later, I promise.
Filling and Sanding
First, I fill all those little staple holes with wood filler. I just apply it with a small scraper and smooth it out.
Once it is dry, I sand the entire surface of each stair. This makes sure everything is smooth and ready for its new finish.
Sanding also helps remove any lingering glue or grime, giving you a perfect canvas to work on.
The Final Clean
After sanding, there will be dust everywhere. I mean everywhere. I vacuum each stair thoroughly and then wipe it down with a damp cloth.
You want the surface to be completely clean before you even think about opening a can of paint or stain.
Any leftover dust will just get trapped in the finish, and nobody wants that. This final clean is the last step before the transformation begins.
What’s Next for Your Stairs?
Now that the dirty work is done and your stairs are prepped and clean, the real creative fun begins. You have a blank canvas.
Will you bring out the natural grain of the wood with a rich stain? Or will you go for a bold new color with paint?
I personally love the classic look of stained treads with painted risers. It gives such a custom feel to the staircase.
This is your chance to really make a statement and tie your staircase into the rest of your home’s decor. Think about your style. Are you modern, traditional, or somewhere in between? Let that guide your decision.
Whatever you choose, your stairs are about to become a major feature in your home, not just something to walk on. Get excited, because the final result is going to be amazing.
FAQs
Ready for Your Stair Makeover?
You did it. The old carpet is gone, and your stairs are ready for a new chapter. Taking on a DIY project like this is so rewarding. You not only save money, but you also get the satisfaction of knowing you did it yourself. Now you have a beautiful staircase that adds character and value to your home. Enjoy every step.

I am Mindy Medford, a home décor, paint, and design specialist with over a decade of hands-on experience transforming ordinary spaces into cozy, personality-packed havens. Since 2013, I have been helping homeowners discover the art of beautiful yet practical design. I share my love for color, texture, and layout—making stylish interiors & exteriors feel achievable for everyone. Whether it’s picking the perfect paint shade or reimagining a small space, I’m here to guide and inspire.