How To Paint Concrete Sidewalks: Easy Steps for A Fresh Look
Ever looked at your drab concrete sidewalk and thought, “This could use some serious help”? Trust me, I have been there. That boring gray slab greeting everyone who walks up to your home is not doing you any favors in the curb appeal department.
Here is the thing, painting your concrete sidewalk is one of the most budget-friendly ways to transform your home’s exterior. And no, you do not need to be Bob Vila to pull this off 🙂
Whether you are dealing with unsightly cracks, stubborn stains, or just want to add some personality to your walkway, a fresh coat of paint can work wonders. Plus, your neighbors will definitely be asking for your secret!
Why Paint Your Concrete Sidewalk?
Before we dive into the how-to, let’s talk about why this project is totally worth your weekend. Painting your concrete sidewalk is not just about making it look pretty (though that’s a huge bonus).
First off, paint acts as a protective barrier. Your sidewalk deals with everything from harsh UV rays to winter salt, and a quality paint job helps shield the concrete from these elements. This means fewer cracks and less deterioration over time.
Then there is the aesthetic factor. A concrete sidewalk makeover can completely change your home’s first impression. Think of it as makeup for your driveway, it smooths out imperfections and gives everything a polished look.
And let’s be real about the cost. Professional concrete replacement? You’re looking at thousands. A DIY paint job? Maybe $100-200 depending on your sidewalk size. IMO, that’s a no-brainer.
Gathering Your Materials and Tools
Here’s where things get practical. You’ll need the right stuff to make this project succeed, and trust me, cutting corners here will bite you later.
Essential Materials:
- Concrete paint (epoxy-based or acrylic latex work best)
- Concrete primer (don’t skip this!)
- Concrete cleaner and etcher
- Crack filler or concrete patch
- Sealer for long-term protection
Tools You’ll Need:
- Pressure washer (or garden hose with serious elbow grease)
- Wire brush for stubborn spots
- Paint rollers and brushes
- Painter’s tape
- Drop cloths
The key here is choosing paint specifically designed for concrete surfaces. Regular house paint won’t cut it—concrete is porous and needs something that can really grip and handle foot traffic.
Preparing Your Concrete Sidewalk
This is where most people mess up. I get it—prep work is boring, but it’s literally the difference between a paint job that lasts years and one that starts peeling next month.
Deep Cleaning is Non-Negotiable
Start by cleaning the surface like your life depends on it. Sweep away all the obvious stuff first—leaves, dirt, random toys the kids left out.
Then break out the pressure washer. If you don’t own one, most hardware stores rent them pretty cheaply. The goal is to blast away years of grime, oil stains, and anything else that might prevent paint adhesion.
For stubborn oil stains (because let’s face it, every sidewalk has them), mix some degreaser with warm water and scrub with that wire brush. These stains are paint adhesion killers, so don’t half-ass this step.
Crack Repair—The Make-or-Break Step
Found some cracks? Welcome to concrete ownership! But seriously, you’ve got to fix these before painting sidewalk concrete.
Clean out any loose debris from the cracks first. Then apply concrete crack filler or patching compound using a putty knife. Make sure you smooth it flush with the surrounding surface—nobody wants bumpy sidewalks.
Let this cure completely according to the manufacturer’s instructions. Usually, we’re talking 24 hours minimum. I know, waiting sucks, but rushing this step will ruin your entire project.
Weather Check
Here’s something that’ll save you major headaches: check the weather forecast. You need at least 48 hours of dry weather for this project. Temperature matters too—aim for somewhere between 50°F and 85°F.
Painting in extreme heat makes the paint dry too fast, leading to poor adhesion. Too cold, and it won’t cure properly. Too humid or wet? Forget about it.
Choosing the Right Paint for Your Sidewalk
Not all paints are created equal, especially when we’re talking about paint concrete sidewalk projects. The concrete is going to expand and contract with temperature changes, deal with moisture, and handle constant foot traffic.
Paint Types That Actually Work
- Epoxy-based paints are your best bet for high-traffic areas. They’re incredibly durable and resistant to chemicals, though they can be a bit more challenging to work with. The trade-off is worth it for the longevity.
- Acrylic latex paints designed for concrete are easier to apply and clean up. They’re more breathable than epoxy, which helps prevent moisture issues. Plus, if you need to do touch-ups later, they’re much more forgiving.
Whatever you choose, make sure the label specifically says it’s for exterior concrete surfaces. This isn’t the place to get creative with leftover interior wall paint.
Primer—Your Paint’s Best Friend
A quality concrete primer is absolutely essential. Think of it as the matchmaker between your concrete and your paint. It fills in the tiny pores in the concrete and creates a smooth, uniform surface for the paint to grab onto.
Choose a primer that’s compatible with your paint type. Water-based paint? Water-based primer. Oil-based paint? Oil-based primer. Mixing types can lead to adhesion problems down the road.
The Painting Process—Step by Step
Alright, here’s where the magic happens. You’ve prepped, you’ve planned, and now it’s time to transform that sidewalk.
Taping and Protection
Before you open that first paint can, protect the surrounding areas. Use painter’s tape to mask off grass, flower beds, and any adjacent surfaces you don’t want painted.
Lay down drop cloths if you’re working near your house or garage. Trust me, concrete paint splatters are permanent, and explaining paint spots on your siding to your spouse is not fun :/
Applying Primer
Start with the edges and corners using a brush, then switch to a roller for the main surface. Apply primer in thin, even coats—you’re not trying to paint a masterpiece here, just creating a good foundation.
Pro tip: Work in manageable sections, especially on hot days. Primer that sits too long in direct sunlight can become difficult to paint over.
Let the primer dry completely. This usually takes 2-4 hours, but check the manufacturer’s recommendations. Rushing this step is like building a house on a shaky foundation.
The Paint Application
Now for the fun part! Apply your paint using the same technique—brush the edges, roll the main areas. How to paint sidewalk properly comes down to maintaining a consistent application and not letting sections dry with obvious lap marks.
Work methodically from one end to the other. If you’re painting a long sidewalk, have a plan for where you’ll end up—you don’t want to paint yourself into a corner (literally).
Most concrete paints require two coats for optimal coverage and durability. Let the first coat dry completely before applying the second. This is typically 4-6 hours, but again, check your paint can.
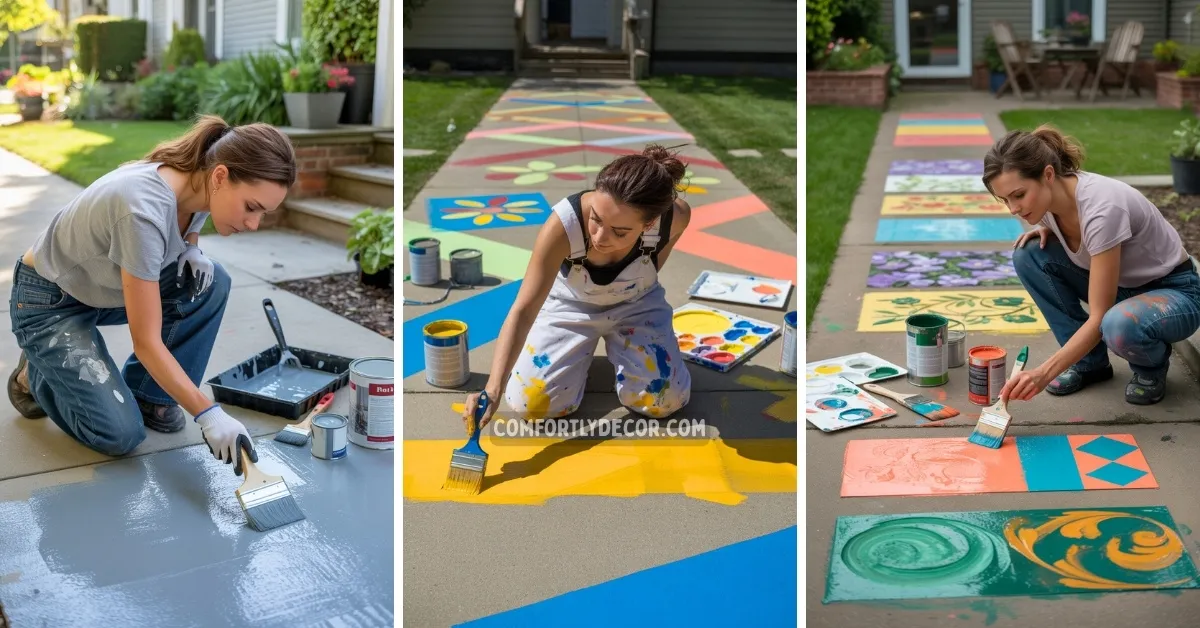
Adding Texture and Patterns
Want to get fancy? This is where you can add some personality to your paint walkway concrete project.
- Stencils can create interesting geometric patterns or decorative borders. Just make sure you remove the stencil while the paint is still slightly wet for clean lines.
- Stamping with textured rollers can give your sidewalk the look of stone or brick. This technique works best when the paint is still tacky but not wet.
Keep it simple for your first project. You can always get more creative next time around.
Sealing and Protection
You’ve painted your sidewalk, and it looks amazing. But we’re not done yet! Sealing your painted concrete adds an extra layer of protection that can double the life of your paint job.
Choosing the Right Sealer
- Clear acrylic sealers are popular because they don’t change the appearance of your paint while providing excellent protection against water, UV rays, and general wear.
- Penetrating sealers soak into the concrete and paint, providing protection from within. These are great for areas that see a lot of moisture.
Apply sealer according to the manufacturer’s instructions, usually 24-48 hours after your final coat of paint has dried.
Maintenance—Keeping Your Sidewalk Looking Fresh
The good news? Maintaining your painted sidewalk isn’t rocket science. The bad news? You actually have to do it 🙂
Regular Cleaning
- Sweep regularly to prevent dirt and debris from grinding into the paint surface. A simple weekly sweep makes a huge difference in longevity.
- Wash monthly with mild soap and water. Avoid harsh chemicals or pressure washing at high settings—these can damage the paint film.
Touch-ups and Repairs
Keep some extra paint for touch-ups. Small chips and worn areas are inevitable, but catching them early prevents bigger problems.
Reapply sealer every 2-3 years to maintain protection. This simple step can extend your paint job’s life significantly.
Common Mistakes to Avoid
Let me save you some frustration by sharing the mistakes I see most often:
- Skipping the primer might seem like a time-saver, but it’s actually a time-waster when your paint starts peeling in six months.
- Painting in bad weather is probably the biggest project killer. I know you’re excited to get started, but patience pays off here.
- Using the wrong paint happens more often than you’d think. Regular house paint on concrete is like wearing flip-flops to run a marathon—it’s just not going to work.
- Rushing the prep work is tempting, but every shortcut you take in preparation shows up later in the final result.
Troubleshooting Common Issues
Sometimes things don’t go perfectly. Here’s how to handle the most common problems:
- Paint not adhering properly usually means inadequate surface preparation. You might need to strip the paint and start over with better cleaning and priming.
- Bubbling or blistering often indicates moisture issues. Check for proper drainage around your sidewalk and make sure the concrete was completely dry before painting.
- Uneven coverage happens when you don’t maintain a wet edge while painting. Work in smaller sections and move quickly to prevent this.
FAQs
Time to Transform Your Sidewalk
Painting concrete sidewalks isn’t just a home improvement project—it’s a total transformation that boosts curb appeal and protects your investment. With the right materials, proper preparation, and a little patience, you can turn that boring concrete slab into a welcoming entrance that makes your home stand out.
The best part? This project typically costs under $200 and can be completed in a weekend. Compare that to concrete replacement, and you’re looking at serious savings while still getting dramatic results.
FYI, the key to success isn’t having professional skills—it’s following the process and not rushing the important steps. Take your time with prep work, choose quality materials, and your painted sidewalk will look great for years to come.
Ready to give your home’s entrance the makeover it deserves? Grab your supplies, pick a good weather weekend, and get ready to be amazed at what a little paint can do!

I am Mindy Medford, a home décor, paint, and design specialist with over a decade of hands-on experience transforming ordinary spaces into cozy, personality-packed havens. Since 2013, I have been helping homeowners discover the art of beautiful yet practical design. I share my love for color, texture, and layout—making stylish interiors & exteriors feel achievable for everyone. Whether it’s picking the perfect paint shade or reimagining a small space, I’m here to guide and inspire.