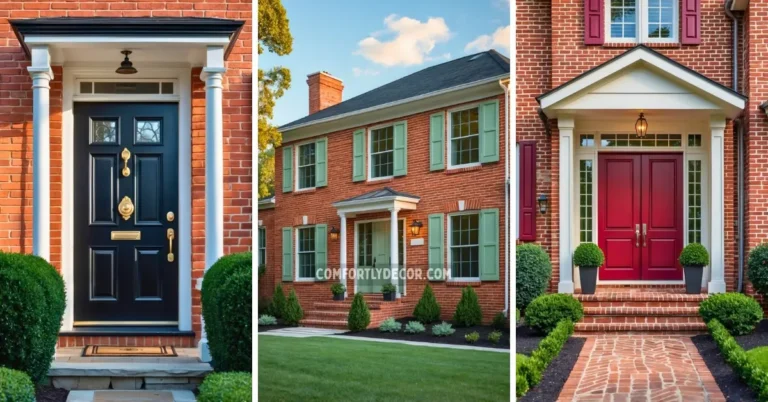
How To Limewash Brick Exterior
Thinking about giving your brick home a facelift? I get it. Red brick can sometimes feel a bit dated. But before you grab a bucket of paint, let me tell you about limewash. It is a game changer for updating brick without completely hiding its character.
It gives you that gorgeous, aged look you see on old European buildings. I will show you how to limewash brick exterior and get that perfect finish.
What is Limewash Anyway?
So what is this magic stuff? Limewash is basically a mix of crushed limestone, water, and pigments. It has been used for centuries.
Unlike paint which forms a solid film on top of brick, limewash sinks into the pores. This means it lets the brick breathe, which is super important for preventing moisture issues.
It creates a soft, chalky finish that highlights the brick texture instead of covering it up. Perfect for a timeless, low maintenance look.
Is Limewash Right for Your Brick?
Before you get too excited, let us talk about whether limewash is a good fit for your house. I love it, but it is not for everyone.
Pros and Cons
| Pros | Cons |
|---|---|
| Limewash is amazing because it is breathable. | However, it is not the most durable finish in areas with heavy rain. |
| This means no trapped moisture, which can cause big problems with regular paint. | You might see some fading sooner than you would like. |
| It also develops a beautiful patina over time, giving your home a unique, weathered charm. |
Best Brick Types
Limewash works best on porous bricks that can absorb the mixture. Think older, more traditional brick types.
I would not recommend it for deteriorating or crumbling brick. Limewash needs a solid surface to bond to. Applying it to damaged brick will just highlight the problems and will not last.
FYI, it is always a good idea to check your brick’s condition first.
Choose the Right Limewash Product
Not all limewash products are created equal. Some things labeled “limewash” are just latex paint with a fancy name. You want the real deal.
Pure Slaked Lime vs Lookalikes
I always recommend using a product made from pure slaked lime. These traditional formulas offer the breathability and authentic look you are after.
The latex “limewash lookalikes” are basically thinned paint. They will not give you the same beautiful, chalky finish or the benefits of a breathable coating.
Do yourself a favor and get the authentic stuff.
Color Options and Tools
While classic white is the most popular choice, limewash comes in other colors too. You can find shades of beige, gray, and taupe that create a soft, earthy look.
Here is a quick checklist of tools you will need:
- Limewash product (I like Romabio Classico Limewash)
- A large bucket for mixing
- A masonry brush or a garden sprayer
- A power washer
- Protective gear like gloves and glasses
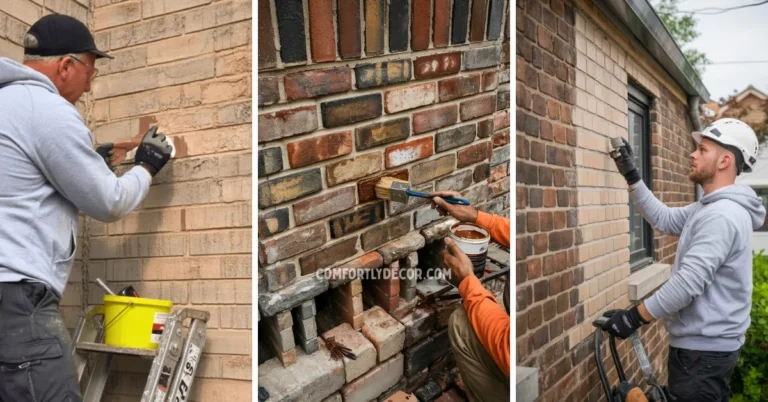
Clean the Brick Thoroughly
You cannot skip this step. Seriously. Applying limewash to a dirty surface is a recipe for disaster. You need a clean canvas for the best results.
Power Washing and Prep
I recommend power washing the brick to get rid of any dirt, grime, or algae. Use a pressure setting around 1500 to 2000 psi.
Be careful not to damage the mortar. While you are at it, check for any loose mortar and repair it before you start. A clean, solid surface is key.
Drying Time
After power washing, you need to let the brick dry completely. This can take anywhere from 24 to 48 hours depending on the weather.
Applying limewash to a wet surface will mess up the absorption and give you a patchy finish. Patience is your friend here.
Mix Limewash Properly
Mixing the limewash correctly is crucial for getting the right consistency and color. It might feel a bit like a science experiment, but it is pretty straightforward.
Dilution Ratios and Testing
The standard dilution ratio is usually one part limewash to one part water. This gives you a semi opaque finish.
If you want a more transparent look, you can add more water. I always suggest testing your mixture on a small, hidden section of the wall first.
Let it dry to see the final color and opacity before you commit to the whole wall.
Adjusting the Tone
Want to tweak the color a bit? You can add mineral pigments to the mixture to get the perfect shade. If the mix looks too thick or opaque, just add a little more water.
It is all about getting the look you want, so do not be afraid to experiment on your test patch.
Apply Limewash Correctly
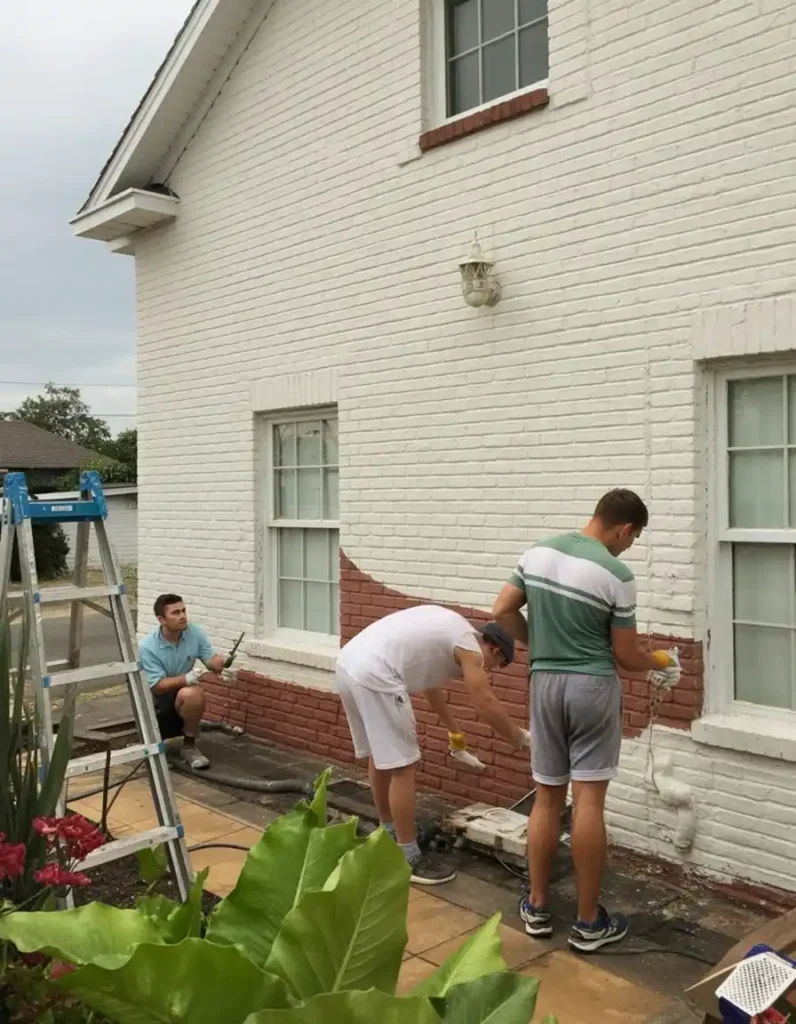
Now for the fun part. Applying the limewash. This is where your vision starts to come to life.
Application Technique
I always start from the top of the wall and work my way down. This helps prevent drips and streaks. Use a large masonry brush for a more traditional, textured application.
If you have a large area to cover, a garden sprayer can speed things up. Just make sure to back brush the area to work the limewash into the brick.
Drying Times Between Coats
Allow the first coat to dry for at least 12 to 24 hours before applying a second one. Rushing this will just pull the first coat off.
Most projects only need one or two coats, depending on how opaque you want the finish to be.
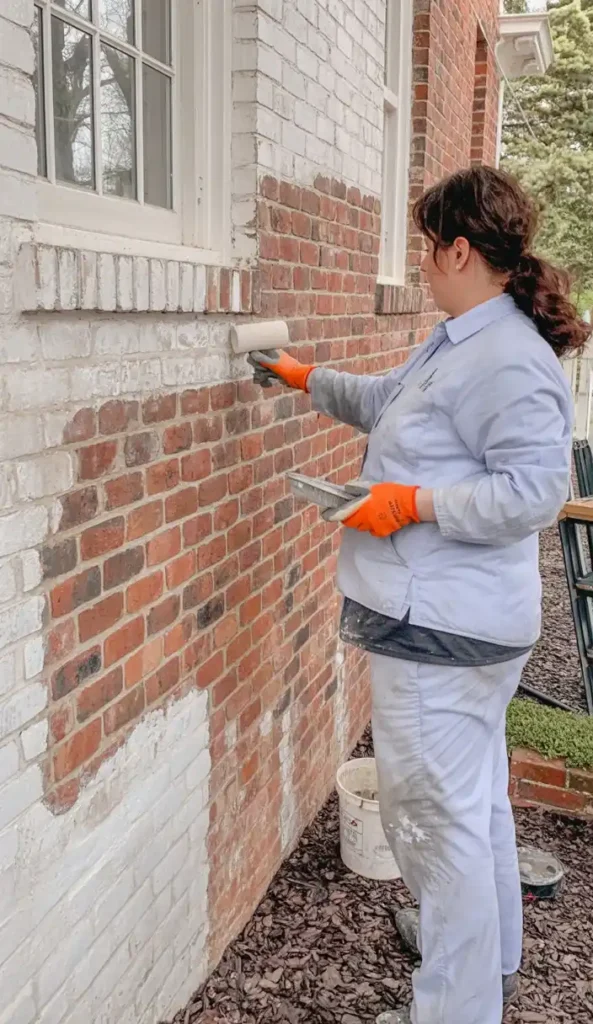
Distress for the “Weathered” Look
This step is optional, but it is my favorite part. Distressing the limewash gives you that beautiful, time worn patina.
Techniques for Distressing
While the limewash is still soft within the first 24 to 48 hours, you can use a few techniques to create a weathered look.
A spray bottle of water and a rag work great for gently washing off some of the limewash in certain spots.
You can also use a pressure washer on a low setting for a more dramatic effect.
Natural vs Intentional Weathering
I like a mix of both. Focus on areas that would naturally weather over time, like around windows and corners. This creates a more authentic, lived in feel.
The goal is to make it look like the house has gracefully aged over decades, not like you took a sander to it.
Maintenance and Recoat Guide
One of the best things about limewash is that it is low maintenance. But it does not last forever.
Lifespan and Fading
Typically, a limewash finish will last about 5 to 7 years. Its longevity really depends on your climate.
In areas with a lot of rain or harsh sun, you might see some fading sooner. But IMO, that just adds to the character.
When to Recoat and When Not to Seal
When it is time for a refresh, you can simply apply a new coat of limewash right over the old one. No need for stripping or heavy prep.
One thing I will say is please do not seal your limewash. Applying a sealer traps moisture and defeats the whole purpose of using a breathable finish.
Mistakes to Avoid
I have seen a few DIY limewash jobs go wrong. Here are some common mistakes to avoid.
- Never apply limewash to a wet or freezing surface: The temperature should be above 40 degrees Fahrenheit.
- Do not use a high gloss sealer: As I mentioned, it traps moisture and can cause the brick to spall.
- Never apply limewash over sealed or painted brick: The limewash needs to penetrate the brick, and it cannot do that if the surface is sealed.
Budget and Time Breakdown
Wondering what this project will cost? Limewash is surprisingly affordable. You can expect to pay around 50 cents to a dollar per square foot for the materials.
If you hire a pro, the cost will be higher, usually between $2 to $4 per square foot. A DIY job on an average sized house can take a weekend or two.
A Timeless Finish for Your Brick Home
So there you have it. Limewashing is a fantastic way to modernize your brick exterior while celebrating its natural texture and character.
It provides a breathable, low maintenance finish that looks better with age. It is a project that rewards you with a truly unique and beautiful home. Ready to give it a try?
FAQs

I am Mindy Medford, a home décor, paint, and design specialist with over a decade of hands-on experience transforming ordinary spaces into cozy, personality-packed havens. Since 2013, I have been helping homeowners discover the art of beautiful yet practical design. I share my love for color, texture, and layout—making stylish interiors & exteriors feel achievable for everyone. Whether it’s picking the perfect paint shade or reimagining a small space, I’m here to guide and inspire.