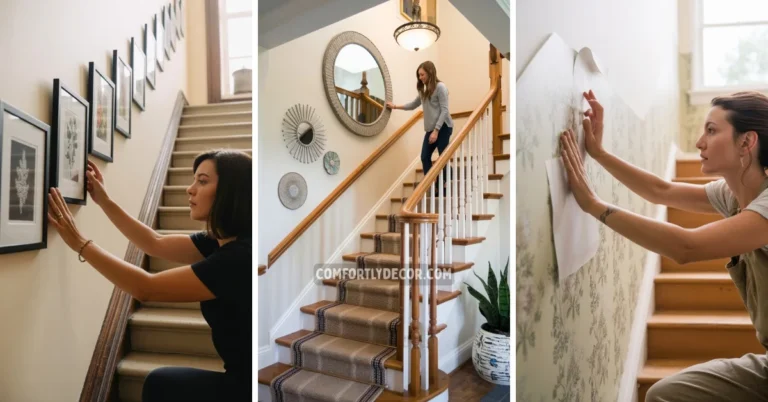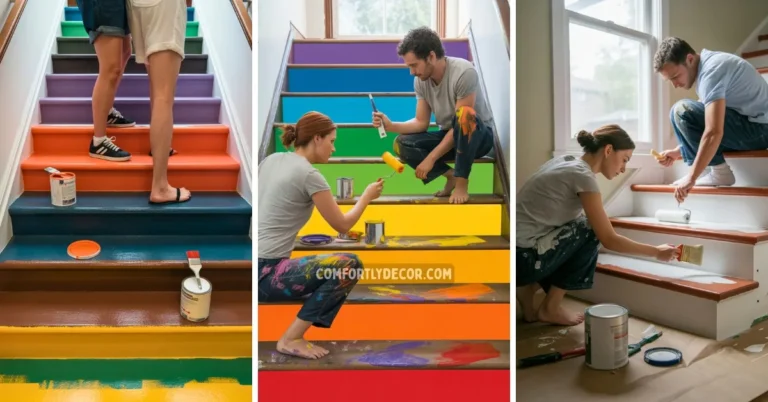
How to Hang Pictures on A Staircase Wall
Turning a blank staircase wall into a beautiful gallery is a fantastic idea. It sounds simple enough, right? Just a few nails and some frames. But then you remember the stairs. The slope. The weird angles. Suddenly, your fun little DIY project feels like a geometry test you did not sign up for. Do not worry. I will walk you through how to hang pictures on a staircase wall without losing your mind. Lets make that staircase wall decor pop.
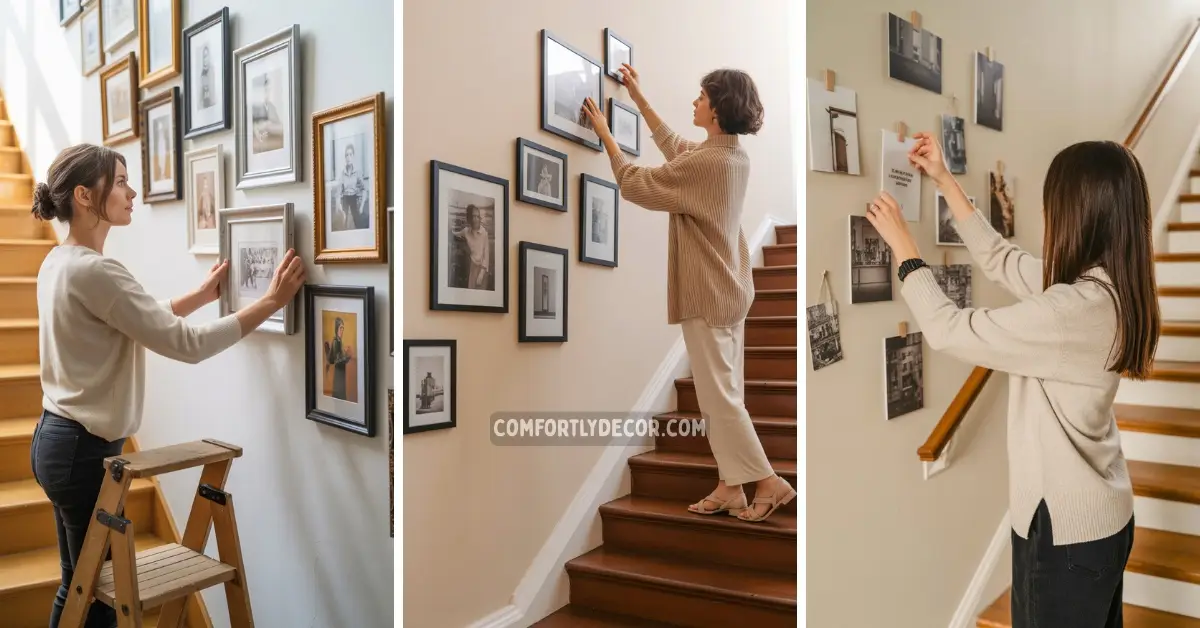
Choosing Your Frames and Layout
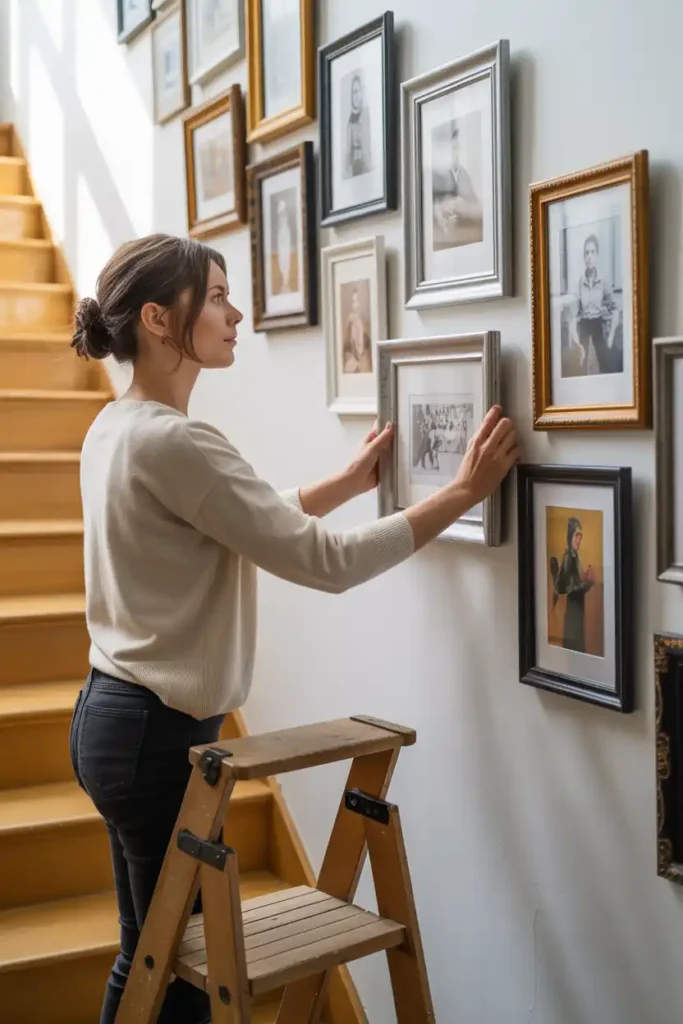
First things first, what is the vibe? I think you should decide if you want a super uniform look or something more eclectic. A consistent style with matching frames creates a clean, cohesive flow that looks very polished. This is great if your home has a minimalist or modern feel.
On the other hand, mixing frame sizes, styles, and even colors can create a dynamic and personal gallery. IMO, the mix and match approach tells a better story.
Measure and Plan Like a Pro
Okay, this is the part where we pretend to be professionals. Grab a measuring tape. You need to figure out the angle of your staircase. I know, more math. But this step is crucial for getting the alignment just right.
Once you have your measurements, start planning your layout. I recommend using painter’s tape or paper cutouts the size of your frames. This lets you test different arrangements on the wall without making a single hole. It is a total lifesaver.
Eye Level is Key
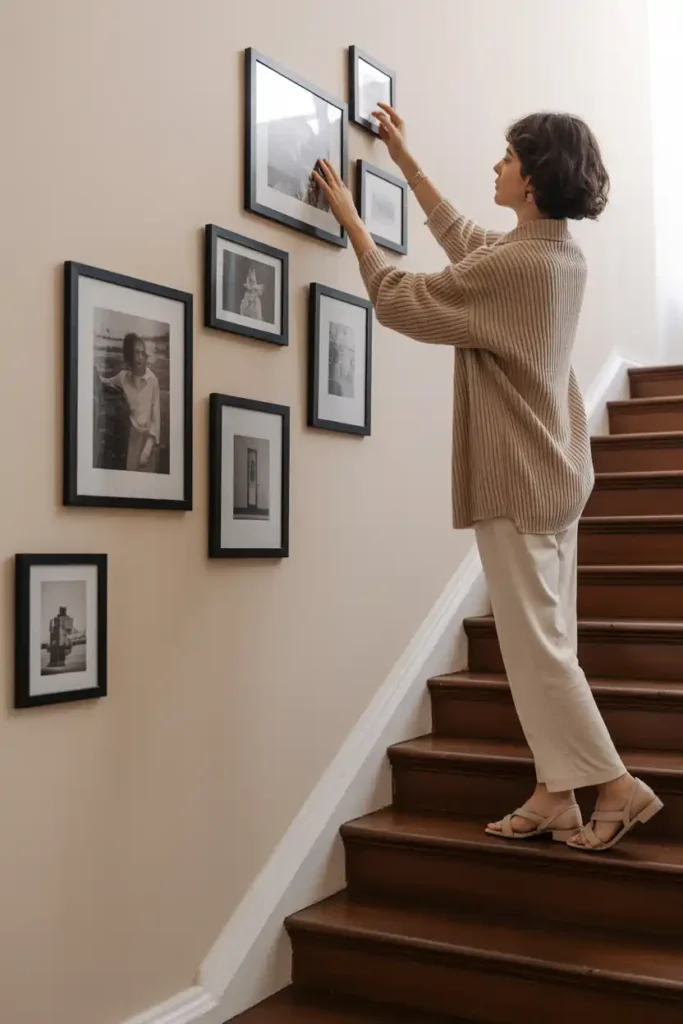
Here is one of the most important picture hanging tips. You need to hang the photos at eye level. But what is eye level on a staircase? It is a moving target.
The general rule I follow is to measure the center of each picture or grouping to be about 60 inches from the floor of each step. This ensures the gallery flows naturally as you walk up or down the stairs. It keeps the visual line consistent and comfortable for the viewer.
Keep Your Spacing Consistent
Symmetry is your friend here. Whether you are going for a parallel line or a cool cluster, maintaining uniform spacing between the frames is essential.
I suggest keeping about 2 to 3 inches between each frame. This creates a balanced and organized look, preventing the wall from feeling cluttered. It does not matter how many pictures you have.
Consistent spacing makes the whole arrangement look intentional and professionally done. It is a small detail that makes a huge difference.
Secure Your Art (Seriously)
A picture crashing down the stairs is not just a mess to clean up. It is also a safety hazard. I cannot stress this enough. Use secure hooks or adhesive systems designed to hold the weight of your frames.
For heavier pieces, I always use a stud finder and proper wall anchors. For lighter frames, high quality adhesive strips can work wonders, especially if you are renting or just hate putting holes in your walls.
Shine a Light on It
Want to take your staircase wall decor to the next level? Add some lighting. Seriously, it changes everything. Strategic lighting can highlight your favorite pieces and add a warm, inviting glow to the entire staircase.
You can install small, adjustable spotlights on the ceiling or even use wall sconces placed between larger frames. It adds a touch of drama and sophistication. Plus it makes your photos look even better.
Gallery Wall Layouts
Feeling a bit stuck on the layout? Here are three popular designs I love for staircase walls. Each offers a different look.
The Parallel Layout
This is a classic for a reason. The frames are hung in two parallel lines that follow the angle of the stairs. It is clean, organized, and works well with frames of the same size.
I think it is perfect for a more formal or traditional home. It gives off a very structured and elegant vibe.
The Diagonal Follow
For a more modern and dynamic look, try a diagonal follow. In this layout, frames of different sizes are arranged to follow the upward slope of the stairs.
I personally love this one because it feels a bit more organic and less rigid. It lets you play with different frame sizes and orientations while still looking cohesive.
The Cluster Design
If you are feeling bold, go for a cluster design. This is where you group frames of various sizes together in a freeform arrangement.
It is a fantastic way to create a focal point and show off a diverse collection of art and photos.
The key is to start with a central, larger piece and build outwards. It looks amazing when done right.
FAQs
Got more questions? Of course you do. This stuff is tricky. Here are some answers to common queries I get about hanging pictures on a staircase wall.
Time to Get Hanging
Now you have the knowledge. You have the tips. You have everything you need to transform that boring staircase wall into a personal work of art. Remember to plan your layout, measure carefully, and use secure hanging methods. It might take a bit of patience, but the final result is so worth it. Your home will thank you for it.

I am Mindy Medford, a home décor, paint, and design specialist with over a decade of hands-on experience transforming ordinary spaces into cozy, personality-packed havens. Since 2013, I have been helping homeowners discover the art of beautiful yet practical design. I share my love for color, texture, and layout—making stylish interiors & exteriors feel achievable for everyone. Whether it’s picking the perfect paint shade or reimagining a small space, I’m here to guide and inspire.