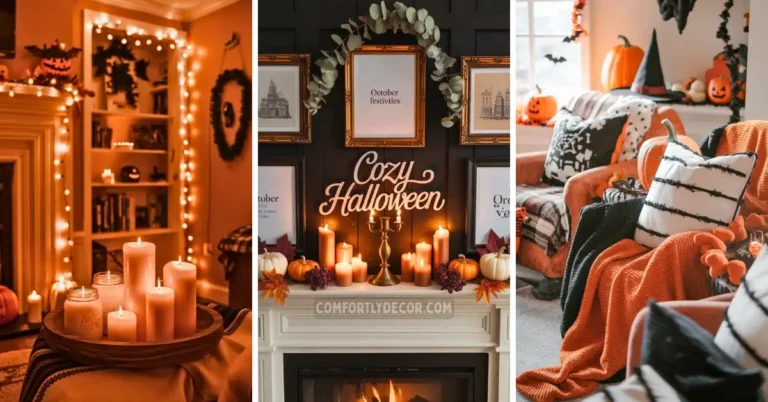
20 DIY Halloween Wall Decor Ideas to Spook Up Your Home
So, your walls are looking a little too cheerful for spooky season. We need to fix that, ASAP. Forget those generic, store-bought decorations that everyone and their grandma has. This year, we’re getting our hands dirty and turning your home into the spookiest spot on the block with some killer DIY Halloween wall decor.
Ready to transform your blank walls into a Halloween masterpiece? I’ve rounded up 20 of my favorite DIY Halloween wall decor ideas that are easy, budget-friendly, and honestly, a ton of fun to make. Let’s get this spooky party started.
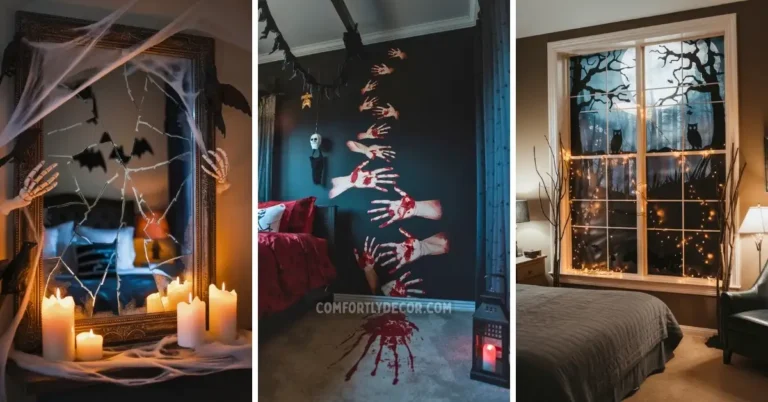
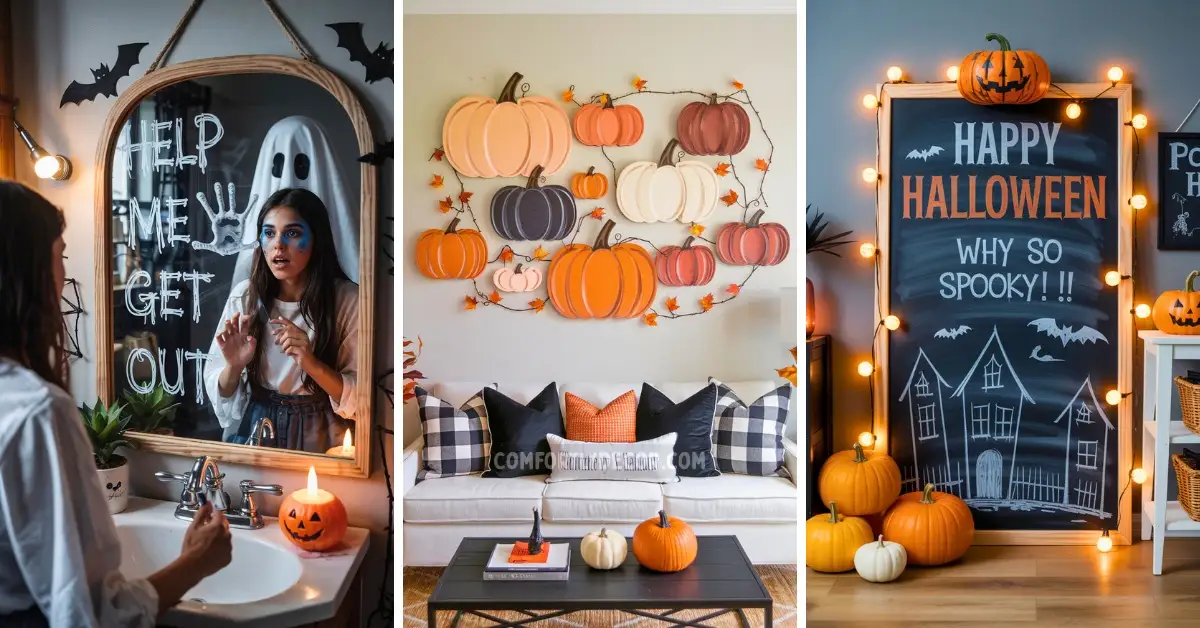
#1. Ghostly Mirror Message

Leave a message from the other side on your mirrors. You can use a bar of soap, a dry-erase marker, or a special window marker to write a spooky message like “Help Me” or “Get Out” on a mirror. The best part? It looks like it was written in the steam after a shower.
Styling Tips:
- Keep it Simple: One or two words in a messy, desperate-looking scrawl is much creepier than a long, neat sentence.
- Add a Handprint: Combine the message with a faint, soapy handprint for an extra touch of terror.
- Choose a High-Traffic Mirror: The bathroom mirror is the classic choice for a reason—it’s guaranteed to startle someone.
Pro Tip: For a really subtle effect, clean your mirror thoroughly and then write your message using just your finger. The natural oils from your skin will leave a faint mark that only appears when the mirror fogs up. Now that’s spooky. 🙂
#2. Window Silhouettes
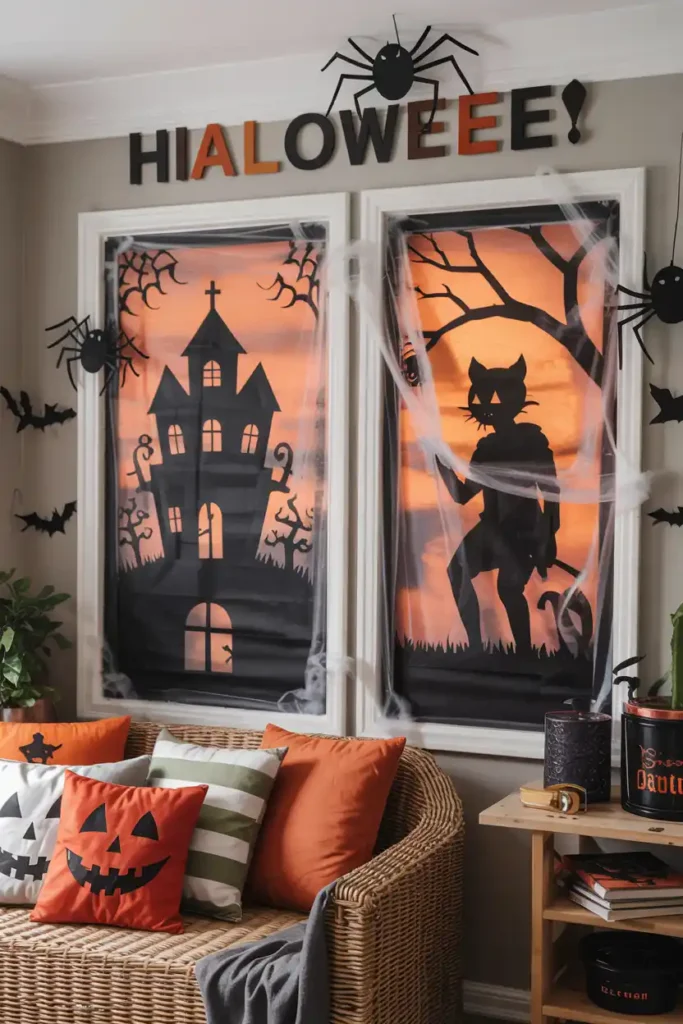

Your windows are basically giant, backlit frames for Halloween decor. Cut spooky scenes out of black poster board—a haunted house on a hill, a creepy cat with an arched back, or the silhouette of a shadowy figure—and tape them to the inside of your windows.
Styling Tips:
- Tell a Story Across Windows: Use multiple windows to tell a larger story. For example, a shadowy figure in one window, and a “victim” silhouette in the next.
- Use Colored Tissue Paper: For a stained-glass effect, cut out sections of your silhouette (like the windows of the haunted house) and tape colored tissue paper behind them.
- Keep It Simple: Often, a single, striking silhouette, like a giant spider or a hangman’s noose, is more effective than a busy, complicated scene.
Pro Tip: When you have the lights on inside your house at night, these silhouettes will be perfectly visible from the outside, turning your whole house into a decoration for trick-or-treaters.
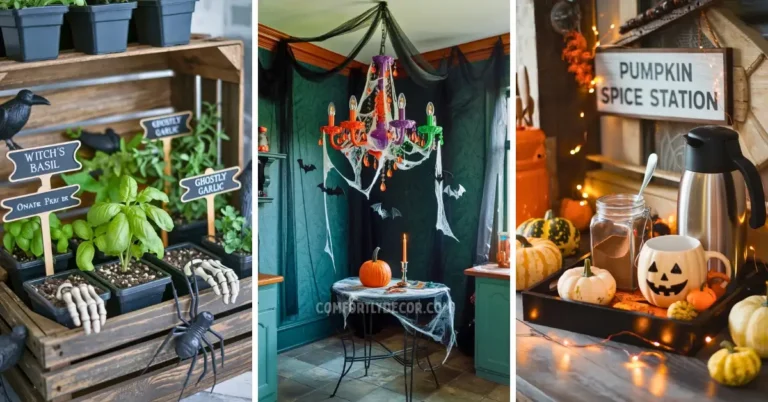
#3. Halloween Chalkboard
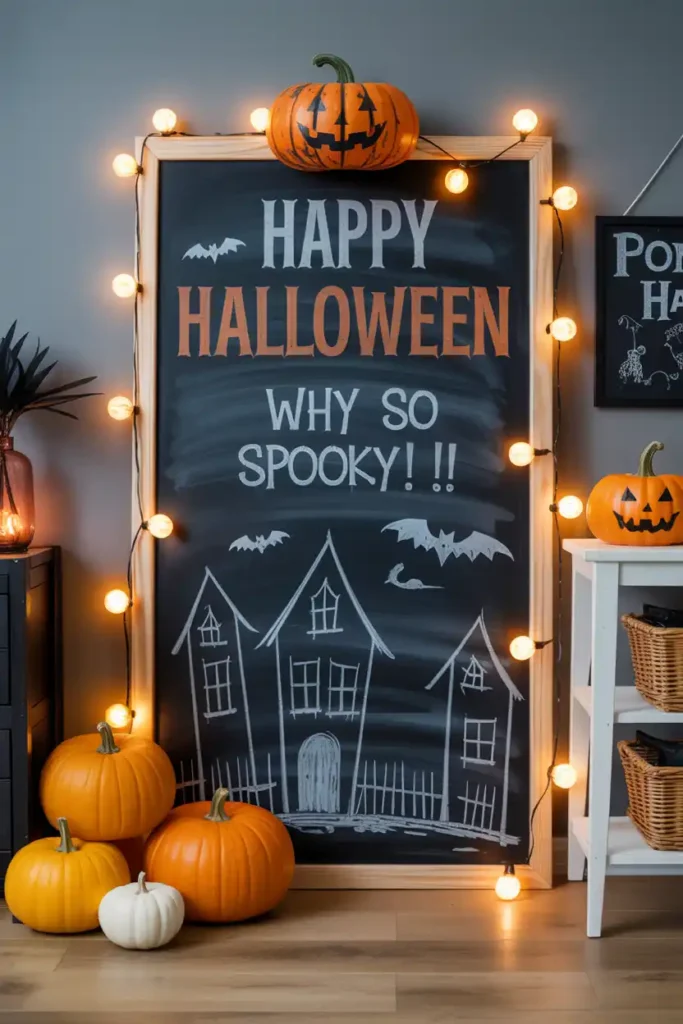
A Halloween chalkboard gives you the freedom to change your decor whenever inspiration strikes. Plus, it’s basically foolproof—even stick figures look spooky with the right context 🙂
Find a large piece of wood or buy a ready-made chalkboard. If you’re going DIY, just paint it with chalkboard paint and let your creativity run wild. This is where you can really let your artistic side shine, even if “artistic” means drawing wobbly pumpkins and crooked haunted houses.
Styling Tips:
- Draw classic Halloween scenes like graveyards or haunted houses
- Write spooky messages in different fonts and sizes
- Use colored chalk for pops of orange, purple, and green
- Frame the board with string lights for extra ambiance
Pro Tip: Create a large chalkboard surface by painting directly onto a section of wall with chalkboard paint. It becomes a temporary Halloween wall that you can completely change up next year—genius, right?
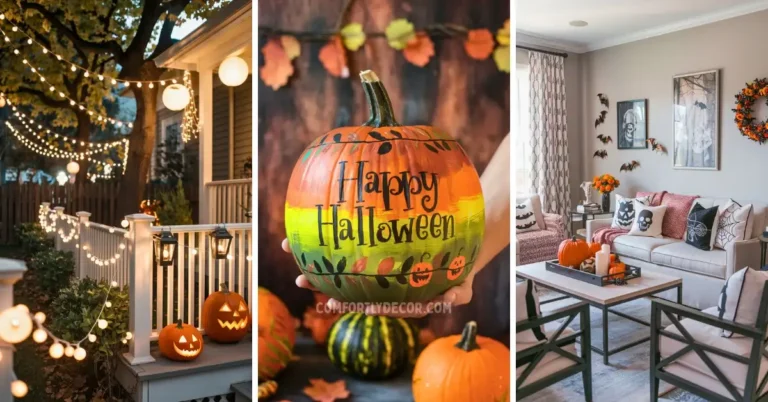
#4. Pumpkin Patch Wall

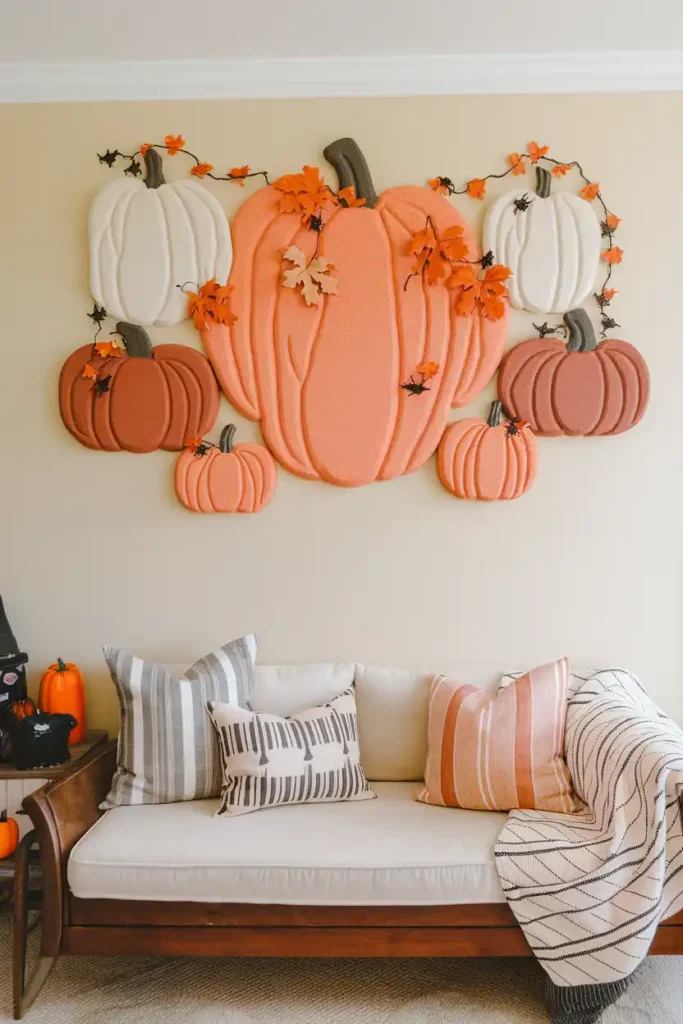
Transform any wall into your personal pumpkin patch without the mess of actual pumpkins rotting on your floor. Smart move, if you ask me.
Collect foam or plastic pumpkins in various sizes—from tiny ones that fit in your palm to medium-sized statement pieces. The magic happens when you mount them directly on the wall using removable adhesive hooks or small shelves.
Styling Tips:
- Mix orange shades from pale peach to deep burnt orange
- Add artificial fall leaves and vine garland between pumpkins
- Stagger heights to create natural-looking clusters
- Include white and cream pumpkins for sophisticated contrast
Pro Tip: Throw in some mini pumpkins scattered around the larger ones. It adds that whimsical, “they just grew there naturally” vibe that makes the whole display feel organic rather than obviously arranged.
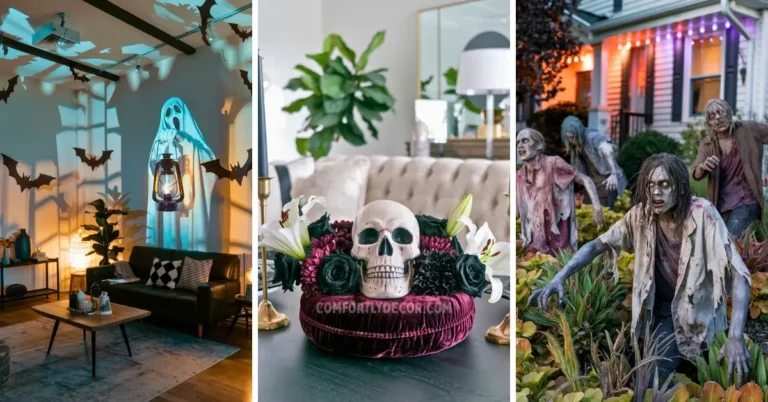
#5. Graveyard Wall Scene
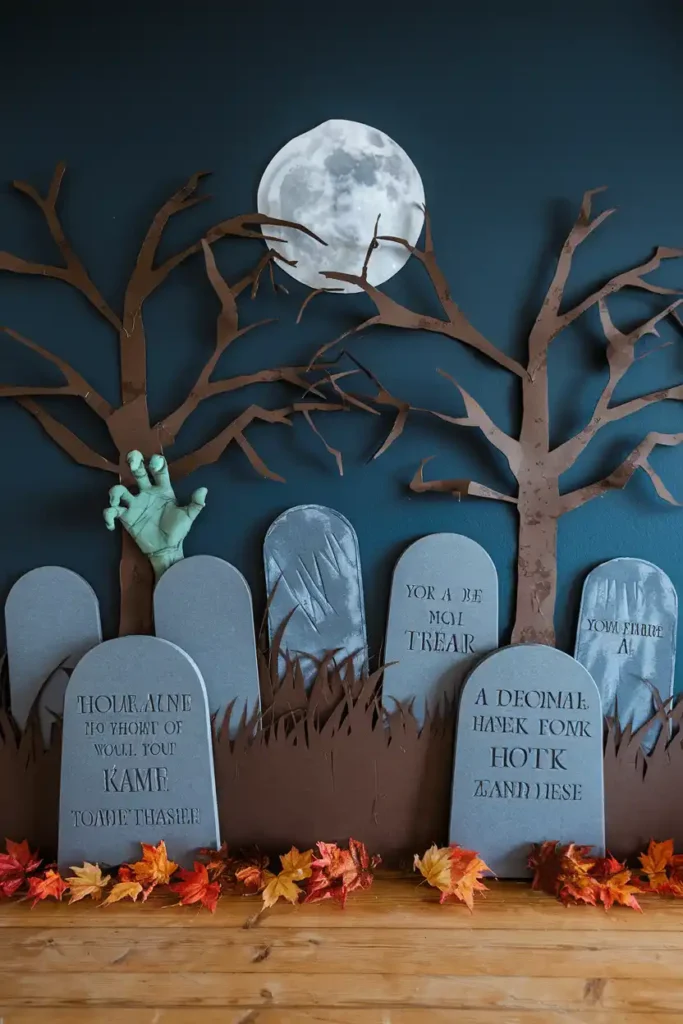
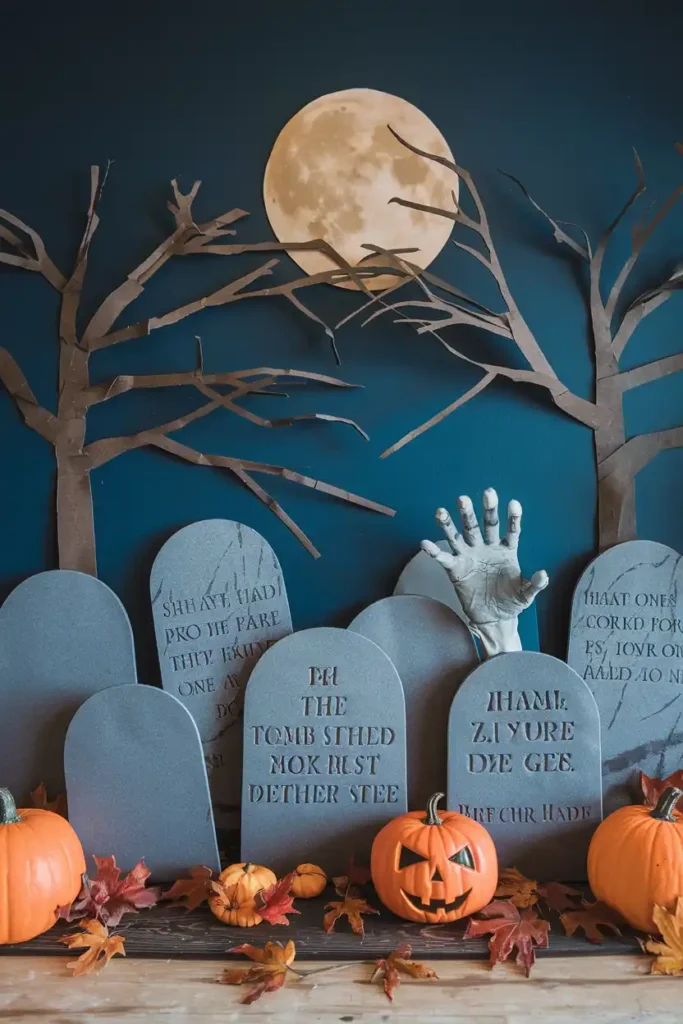
Transform your wall into a miniature graveyard complete with tombstones, dead trees, and maybe a zombie hand or two.
Cut tombstone shapes from gray cardboard or foam board. Add weathered details and epitaphs—funny ones work great for a lighter Halloween vibe.
Styling Tips:
- Layer tombstones at different depths
- Add bare tree branches between stones
- Include a full moon backdrop
- Scatter autumn leaves at the base
Pro Tip: Write hilarious epitaphs on your tombstones. “Here Lies My Diet—It Was Good While It Lasted” always gets a laugh and lightens the spooky mood.
#6. Creepy Doll Collection
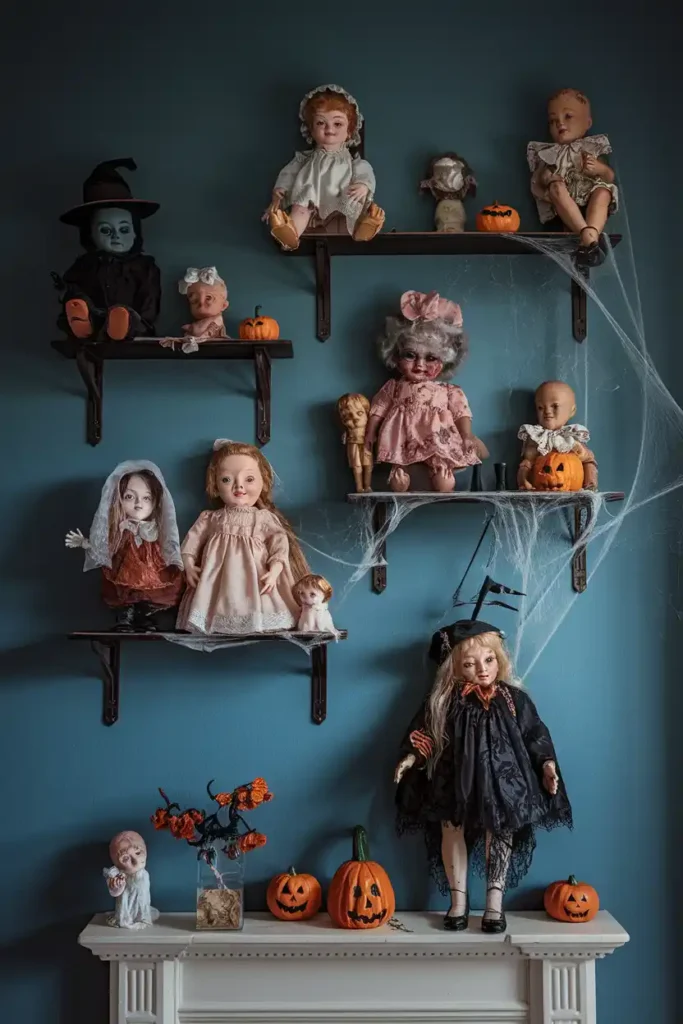
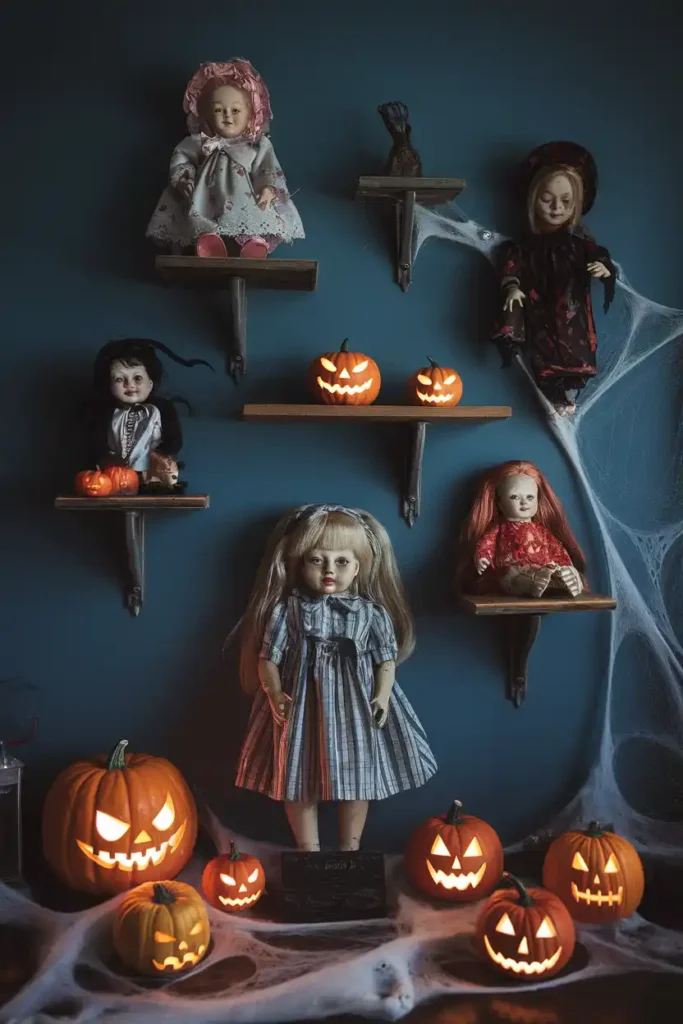
Nothing says Halloween quite like a collection of vintage dolls with their slightly unsettling stares—sorry, doll collectors, but you know it’s true!
Arrange vintage or vintage-looking dolls on wall shelves, and maybe give them some subtle spooky makeovers with strategic lighting and positioning.
Styling Tips:
- Use dim, directional lighting for dramatic shadows
- Mix doll sizes and styles
- Add cobwebs and dust effects
- Position some dolls looking directly outward
Pro Tip: Battery-operated motion sensors can make doll eyes “glow” when someone walks by. It’s delightfully terrifying and guaranteed to make guests jump.
#7. Spooky Antique Portraits
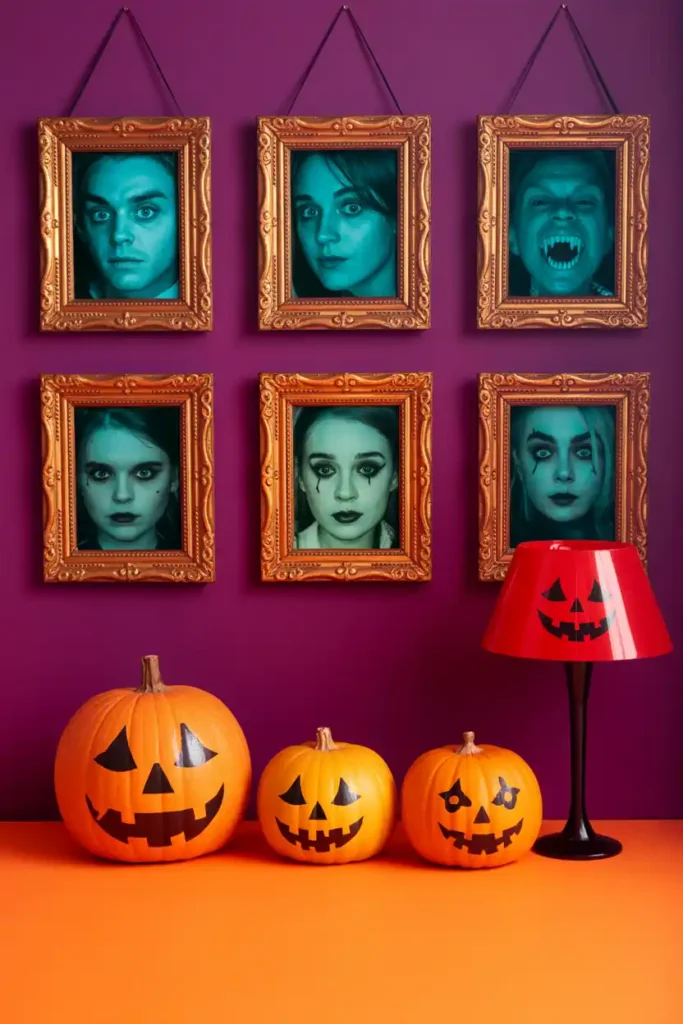
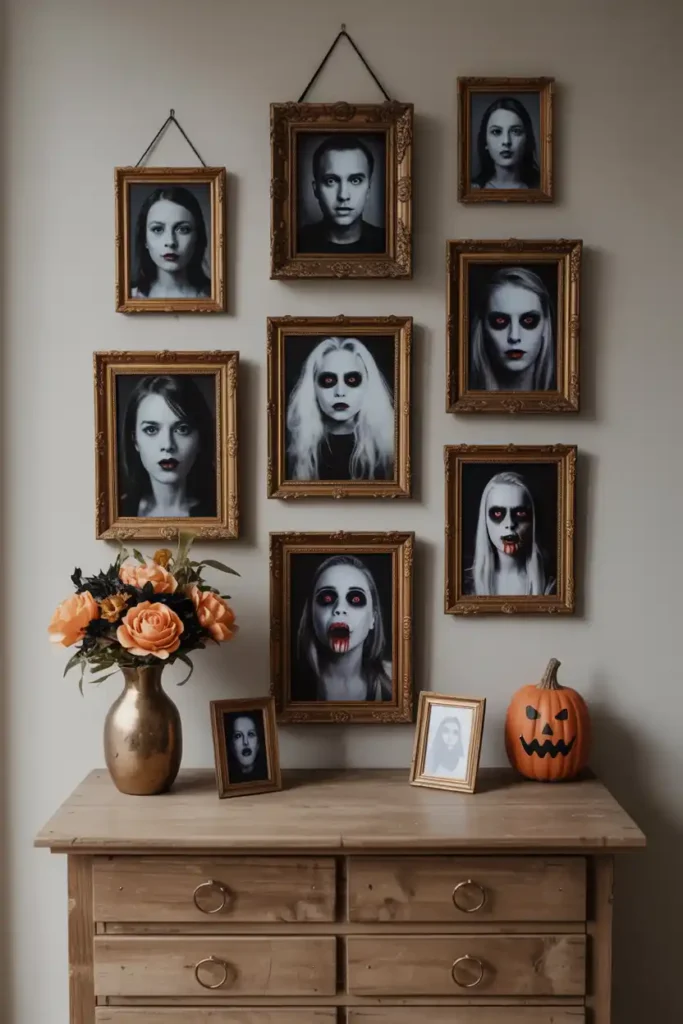
Time to give your family photos a Halloween makeover. Find some cheap, old-fashioned frames from a thrift store and print out spooky, altered images to put inside them. Think glowing eyes, vampire fangs, or ghostly figures. It’s a subtle yet unsettling touch that guests will love discovering.
Styling Tips:
- Go for a Gallery Wall: Create a gallery wall of these spooky portraits on a main wall. Mix different frame sizes and styles for a curated, old-mansion feel.
- Use Black and White: Printing the images in black and white or sepia tones enhances the vintage, haunted aesthetic.
- Subtle is Spookier: Don’t make the alterations too obvious. A barely-there ghost in the background or slightly-too-sharp teeth are often creepier than over-the-top gore.
Pro Tip: You can find tons of free “haunted” portrait images online or use a simple photo editing app to alter your own family pictures. Just maybe warn your family before they see themselves with fangs.
#8. Dangling Cheesecloth Ghosts
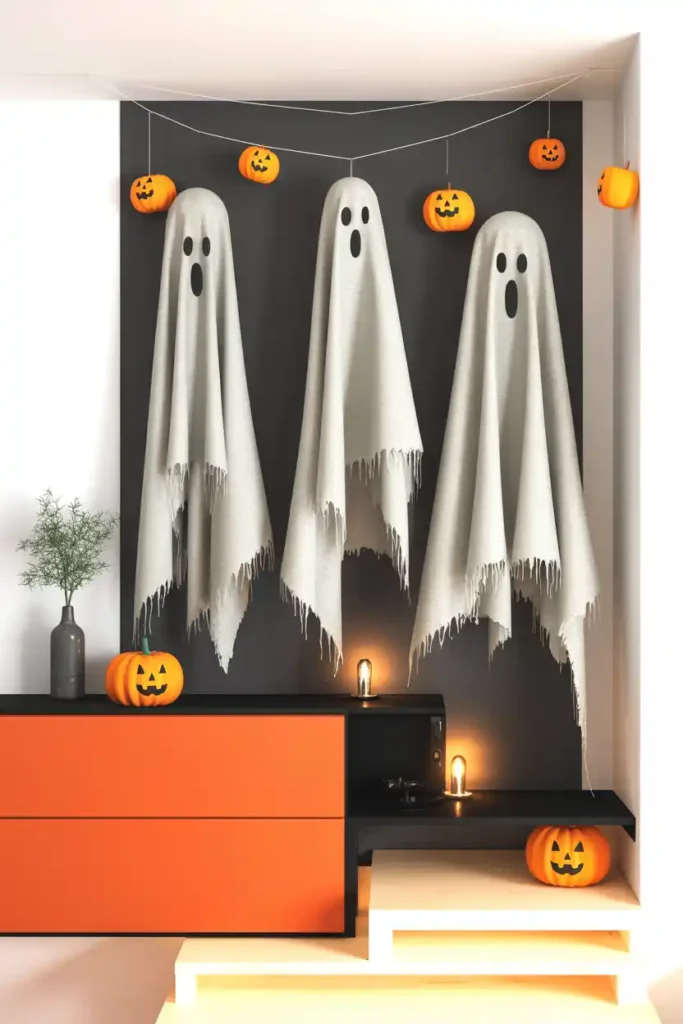
These aren’t your basic, bedsheet-with-eye-holes kind of ghosts. These are elegant, ethereal spirits that float delicately in the air. By draping cheesecloth over a simple balloon-and-bottle form and stiffening it with starch, you can create ghostly figures that seem to hover in your home.
Styling Tips:
- Group Them Up: Create a family of ghosts in different sizes and hang them together in a corner or above a sideboard.
- Light Them from Below: Place a small, battery-operated uplight beneath the hanging ghosts. The light shining through the gauzy cheesecloth is super eerie.
- Shred the Ends: Once the cheesecloth is dry and stiff, shred and tear the bottom edges to make them look more tattered and ghostly.
Pro Tip: Use liquid fabric starch for the best results. Watered-down glue works too, but the starch gives the cheesecloth a translucent, ghostly quality that’s hard to beat.
#9. Bloody Handprint Wall Clings
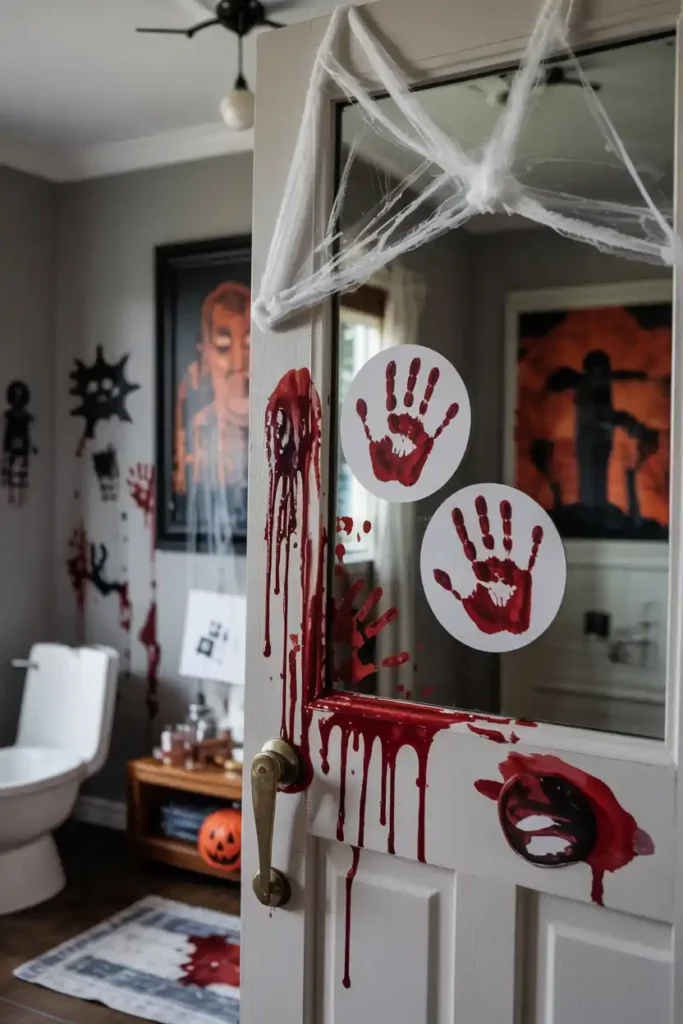
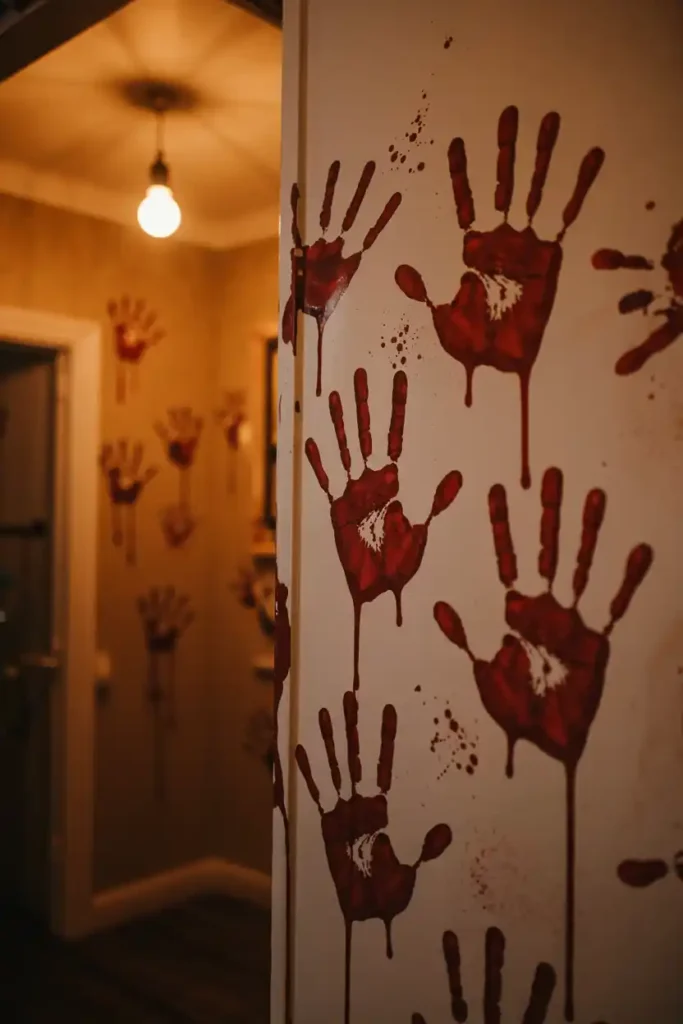
Want to make it look like a horror movie scene just went down in your house? DIY bloody handprint clings are the way to go. Using a mixture of school glue and red food coloring, you can create realistic, peel-able “blood” stains for your walls, mirrors, and windows.
Styling Tips:
- Tell a Story: Don’t just place them randomly. Create a trail of handprints leading up a wall or a desperate smear near a doorknob.
- Mix Handprints and Splatters: In addition to handprints, create some drips and splatters to add to the gruesome effect.
- Target High-Traffic Areas: Place them in unexpected but noticeable places, like on the bathroom mirror or the inside of the front door, for a good jump scare.
Pro Tip: Create the clings on a sheet of wax paper or plastic wrap. Once they are completely dry, they’ll peel right off and can be stuck to any smooth surface.
#10. A Wall of Creepy Crawlies
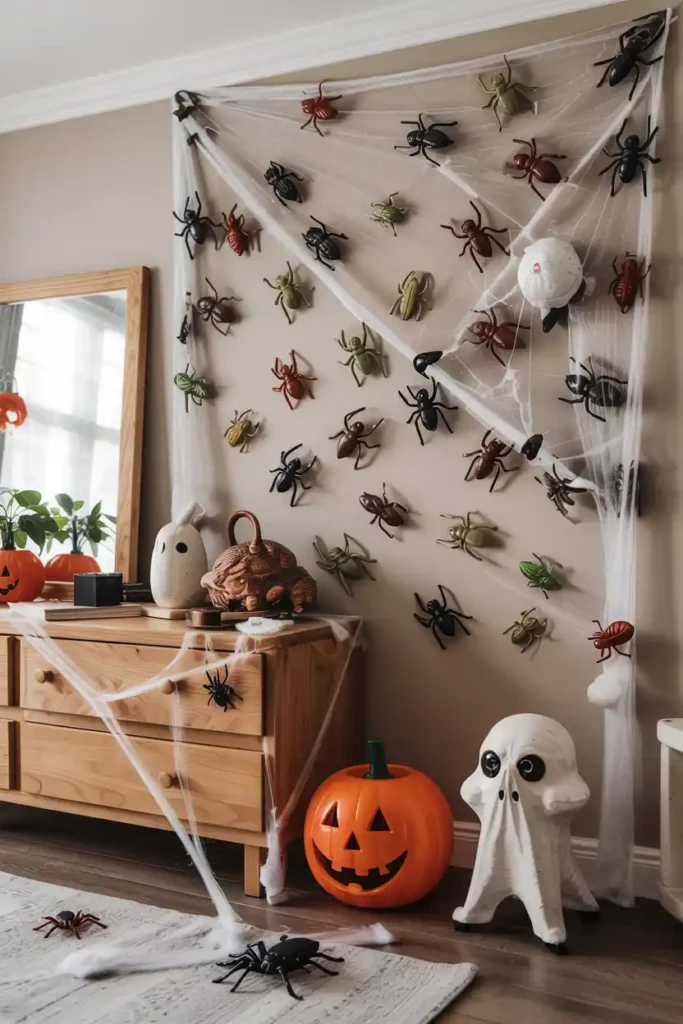
Give your guests the heebie-jeebies by covering a wall with an infestation of plastic bugs. Roaches, spiders, centipedes—the grosser, the better. It’s an incredibly simple DIY Halloween wall decor idea that has a huge impact, especially for anyone with a bug phobia.
Styling Tips:
- Create a Path: Have the bugs crawling out of a vent, from under a piece of furniture, or towards a faux food source.
- Mix and Match: Use a variety of different bugs in different sizes to make the infestation look more chaotic and “natural.”
- Concentrate the Swarm: The effect is much stronger if you have a dense cluster of bugs in one area rather than spreading them out thinly across the whole wall.
Pro Tip: A small dot of hot glue is all you need to stick these lightweight plastic bugs to the wall. It holds them securely and peels off easily after Halloween without damaging the paint.
#11. Giant Eyeball Wall
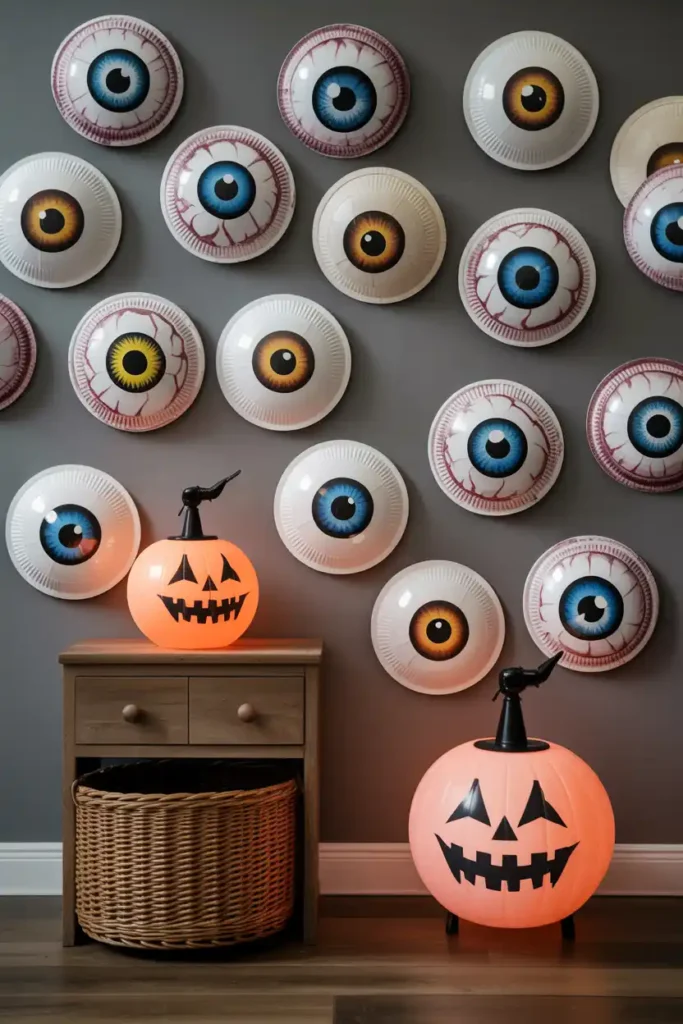
Nothing says “I’m watching you” quite like a wall full of giant, unblinking eyes. Paint or draw large, spooky eyes onto paper plates or cardboard cutouts and stick them all over a wall. It’s a surreal and unsettling Halloween wall decor idea that is sure to make an impression.
Styling Tips:
- Vary the Gaze: Have the eyes looking in different directions. Some looking straight ahead, some looking to the side. It creates a feeling of being watched from all angles.
- Use Glow-in-the-Dark Paint: Paint the irises or the entire eyeball with glow-in-the-dark paint for a terrifying effect when the lights go out.
- Place Them in Pairs: While a wall of single eyes is creepy, placing them in pairs peering out from behind furniture or doorways can be even more startling.
Pro Tip: Use different sizes of paper plates to create eyes of varying dimensions. This simple trick adds a lot of depth to your wall of watchers.
#12. Creepy Tree Silhouettes
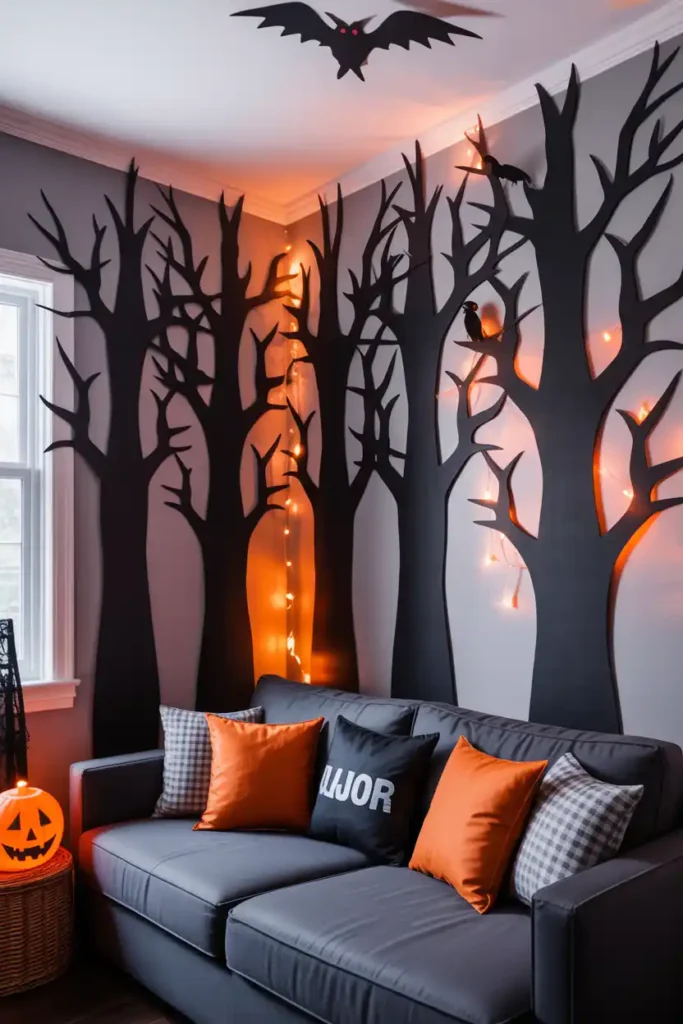
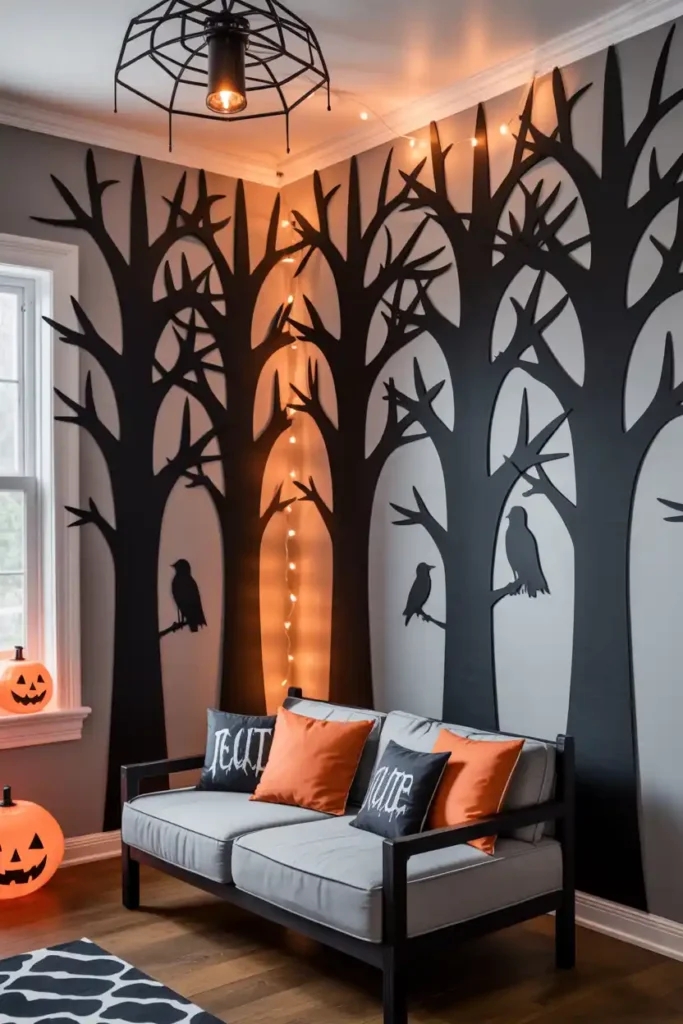
Bring the haunted forest indoors by creating large tree silhouettes out of black poster board or craft foam. These gnarled, leafless trees with spindly branches look fantastic stretching up a wall, especially when backlit.
Styling Tips:
- Backlight for Drama: Place some orange or purple string lights behind the cutouts to create a spooky, glowing sunset effect.
- Add Creatures: Perch a paper crow or a plastic owl on one of the branches to add a little life to your spooky scene.
- Extend to the Ceiling: Make your trees tall and have the branches spread across the ceiling for a more immersive, forest-like feel.
Pro Tip: Don’t worry about making the branches perfect. The more twisted, crooked, and gnarled they are, the spookier your haunted trees will look.
#13. Halloween Word Garland
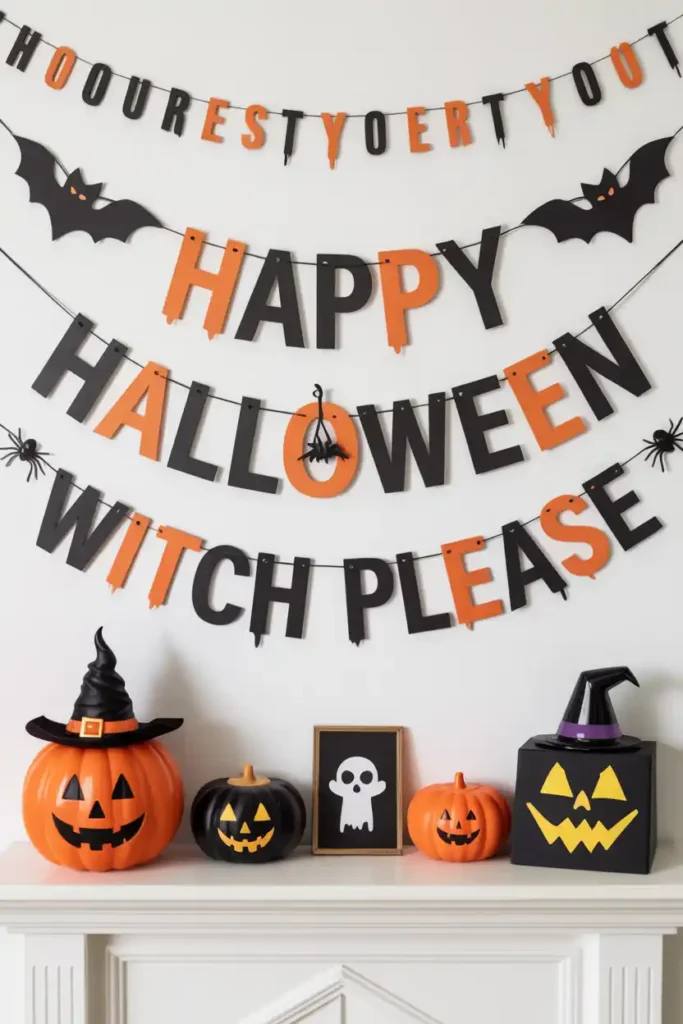
Sometimes you just need to spell it out. Create a custom garland with a spooky phrase like “Beware,” “Trick or Treat,” or “Double, double, toil and trouble.” You can cut the letters out of black glitter cardstock, felt, or even old book pages.
Styling Tips:
- Layer with Other Garlands: Pair your word garland with a simple pumpkin or ghost-shaped garland for a layered look.
- Use Interesting Fonts: Choose a spooky, gothic, or drippy font for your letters to really sell the Halloween theme.
- Add Embellishments: Glue small plastic spiders or tiny skull beads onto the letters for a little extra ghoulish detail.
Pro Tip: Use a hole punch and some twine or black ribbon to string your letters together. It’s quick, easy, and looks much cleaner than trying to tape the string to the back of each letter.
#14. Skeleton Flamingo Wall Art
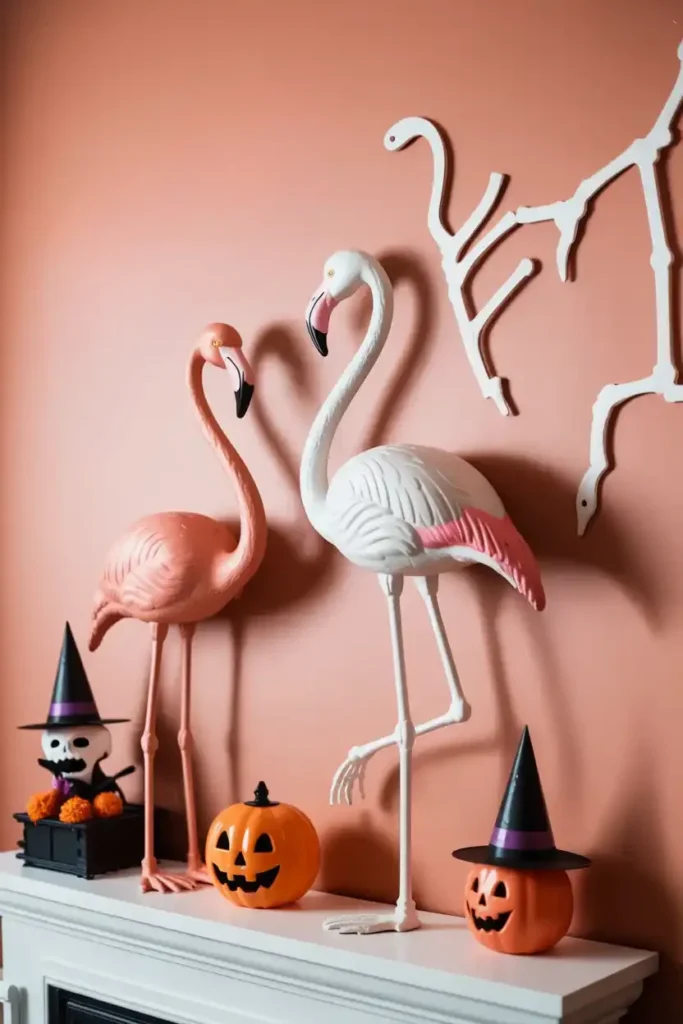
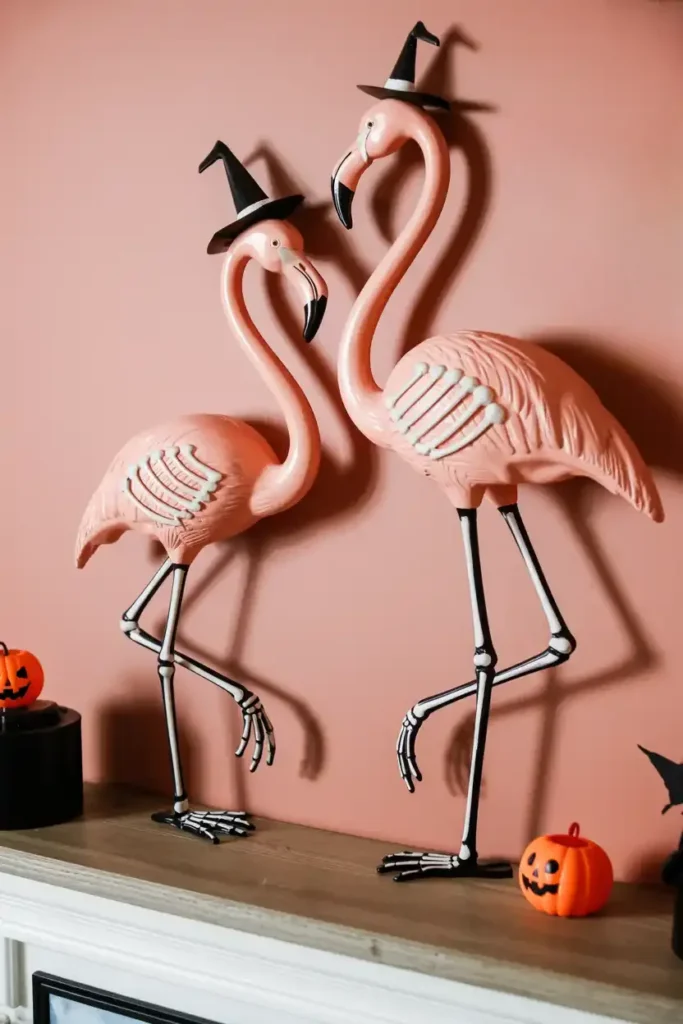
Give a classic lawn ornament a spooky twist. Get a couple of those iconic pink plastic flamingos, spray paint them bone-white, and then use a black marker to draw on skeletal details. Mount them on the wall for a quirky and humorous piece of Halloween art.
Styling Tips:
- Pose Them Dynamically: Mount the flamingos so they look like they are walking up the wall or interacting with each other.
- Add Accessories: Give your skeleton flamingos tiny witch hats or bow ties for an extra dash of personality.
- Create a Flock: This idea is definitely a “more is more” situation. A whole flock of skeleton flamingos is much more impactful than just one or two.
Pro Tip: Use a spray paint that is specifically designed for plastic. It will adhere much better and give you a smoother, more durable finish.
#15. Eerie Fabric Draping
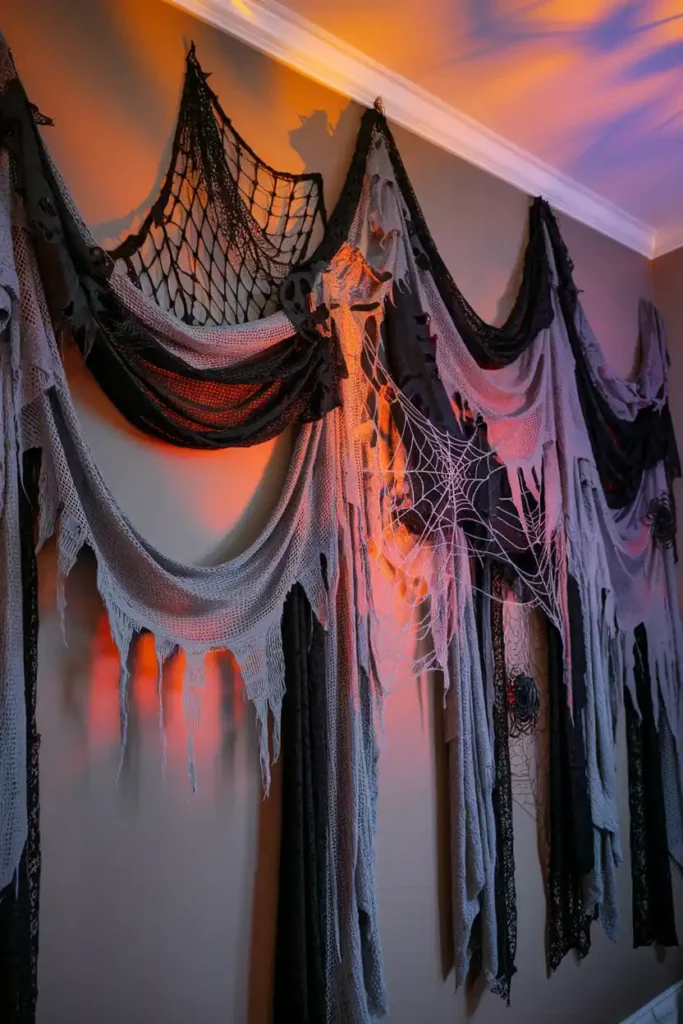
Never underestimate the power of some well-placed, creepy fabric. Draping black or gray cheesecloth, torn-up gauze, or black netting over mirrors, doorways, and windows can instantly add a layer of age and decay to your home.
Styling Tips:
- Shred and Tear: Don’t just hang the fabric. Rip it, shred it, and let it hang in tatters for a more authentic, haunted-house look.
- Dust with “Cobwebs”: Stretch out some of that fake spider web material and integrate it with the draped fabric to make it look ancient and forgotten.
- Layer Different Textures: Combine different types of fabric, like heavy black netting with light, airy gray cheesecloth, to create more depth and visual interest.
Pro Tip: Soaking the cheesecloth in a bucket of diluted black or brown paint and then letting it dry will give it a grimy, aged look that’s perfect for Halloween.
#16. A Murder of Crows
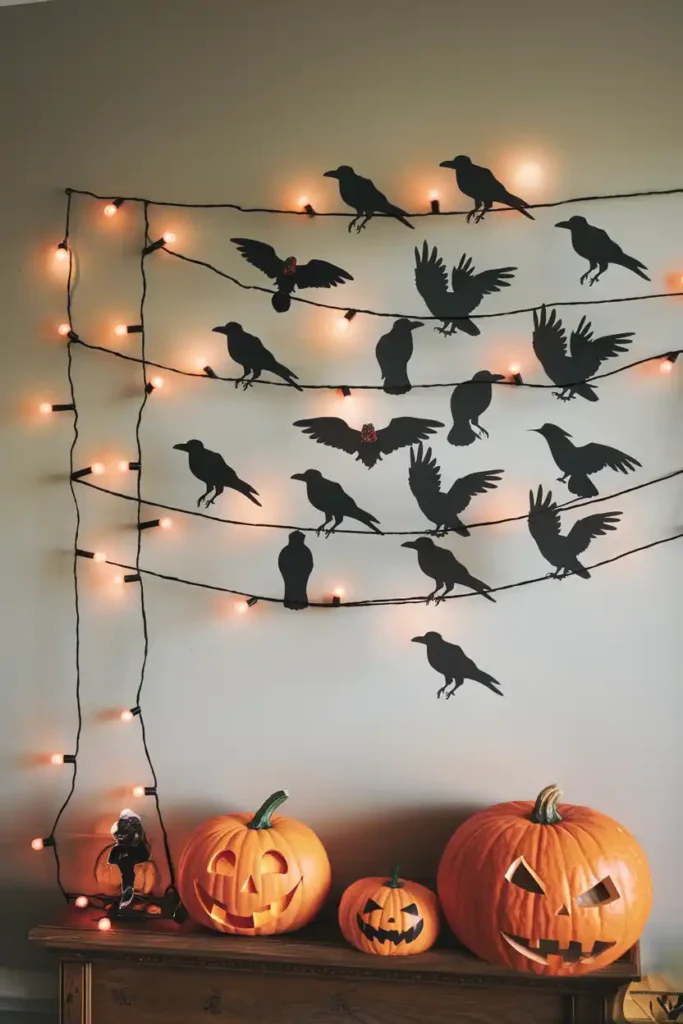
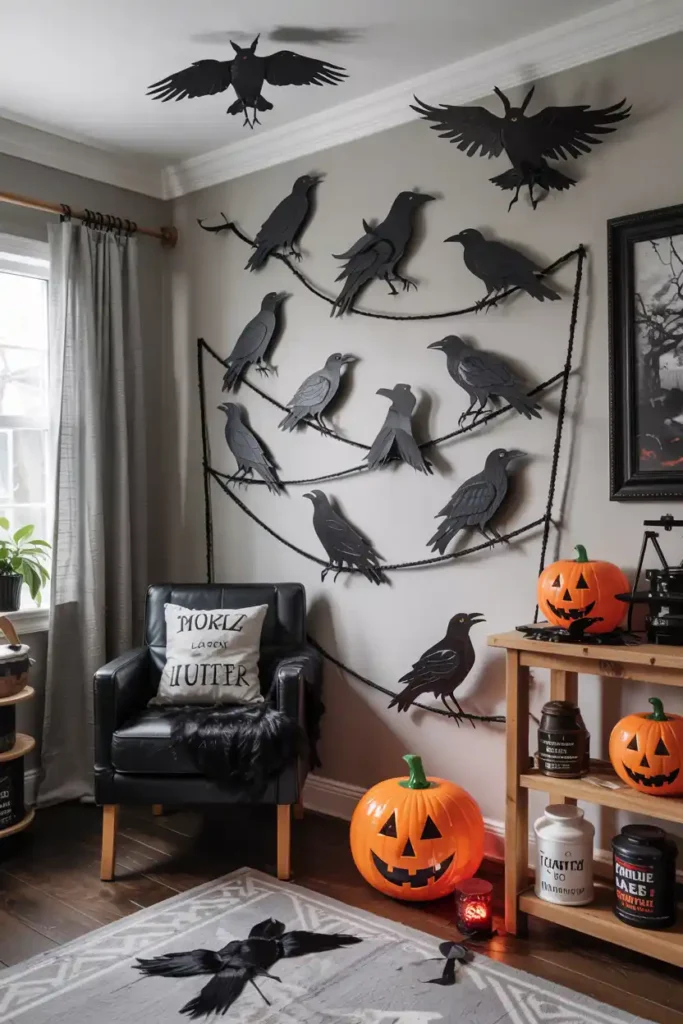
One crow is just a bird, but a group of crows (a “murder,” FYI) is an omen. Create a flock of black paper crow silhouettes and have them perched on a picture rail, gathering on a wall, or flying towards the ceiling. It’s a simple but deeply unsettling visual.
Styling Tips:
- Mix Poses: Use silhouettes of crows in different poses—some in flight, some standing, some with their heads cocked.
- Place Them on “Wires”: Stretch black yarn across a wall to look like telephone wires and place your crow cutouts on them.
- Add Red Eyes: A tiny dot of red glitter glue for an eye on each crow can make them look extra menacing, especially when the light catches them.
Pro Tip: Use black cardstock for the silhouettes. It’s sturdy, the color is rich, and it creates a sharp, clean outline that looks great against a light-colored wall.
#17. Hanging Specimen Jars
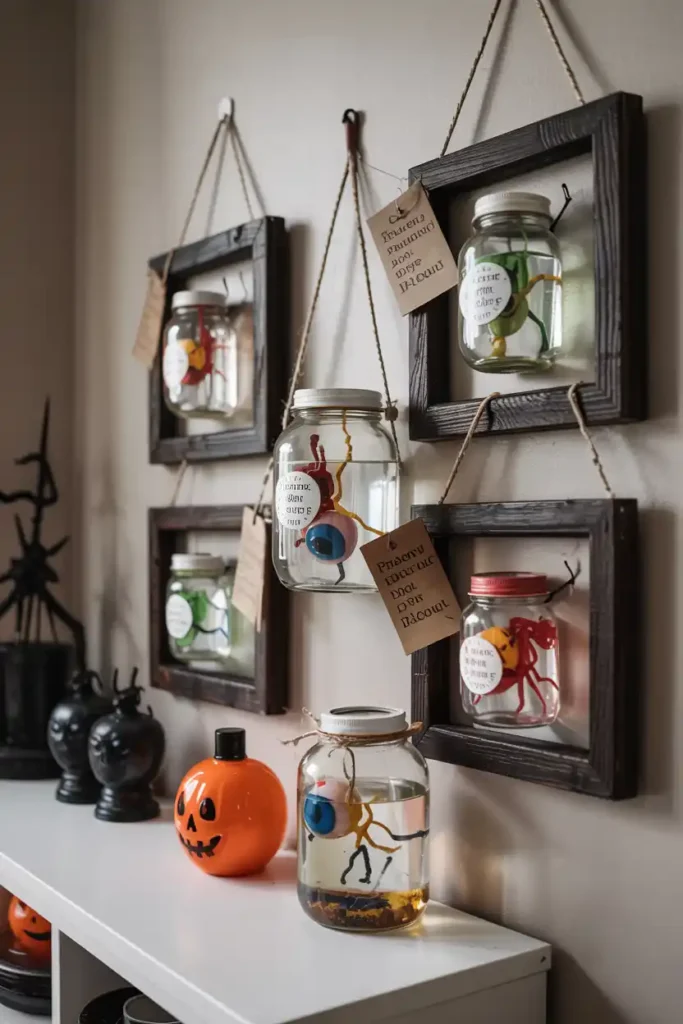
This is a 3D take on the framed specimen art. Collect some old glass jars and fill them with water, a drop of food coloring (yellow or green works well), and some creepy plastic toys like eyeballs, spiders, or severed fingers. Mount them on small shelves along the wall.
Styling Tips:
- Create “Preserved” Labels: Print out official-looking specimen labels with spooky names and tie them around the neck of each jar with twine.
- Use Different Jar Shapes: A collection of jars in various shapes and sizes looks more like a genuine, haphazard collection from a mad scientist’s lab.
- Add Bubbles: A small piece of an Alka-Seltzer tablet dropped in right before guests arrive will create some ominous bubbling.
Pro Tip: To make things look suspended in the liquid, use clear fishing line to tie the item to the inside of the jar lid before screwing it on.
#18. Floating Witch Hats
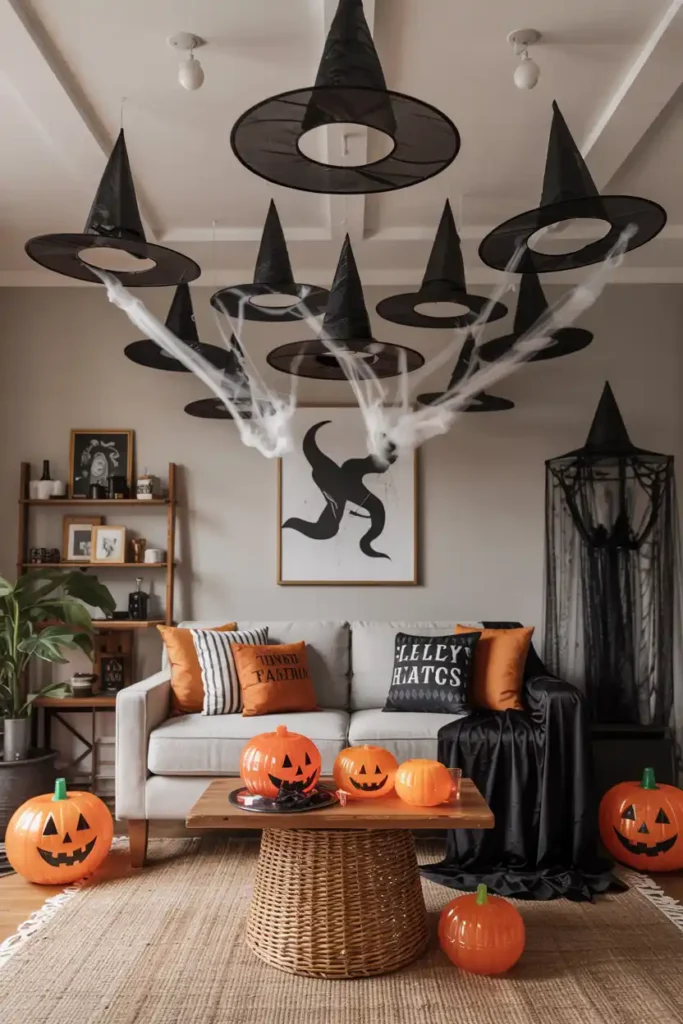
Let’s kick things off with a classic. Floating witch hats are an absolute showstopper and ridiculously easy to create. The idea is to hang simple black witch hats from your ceiling at varying heights, creating the illusion that a coven has just apparated into your living room. It’s a high-impact look for minimal effort.
Styling Tips:
- Vary the Heights: Hang the hats at different levels to create depth and make the display look more dynamic.
- Add Glow Sticks: For a nighttime effect, crack a few glow sticks and tuck them inside the hats. It creates an eerie, magical glow.
- Clump and Scatter: Create a dense cluster of hats in one main area (like over your couch or dining table) and then scatter a few more around the room to extend the theme.
Pro Tip: Use clear fishing line and clear adhesive hooks to hang the hats. This makes the string virtually invisible, really selling the “floating” illusion.
#19. Swarm of Paper Bats
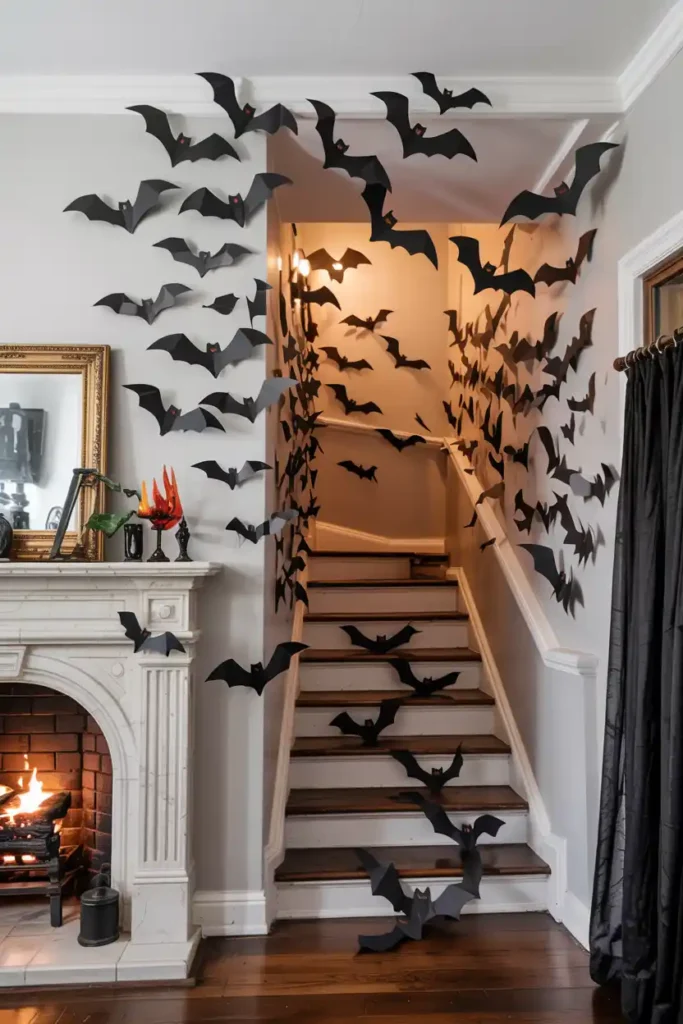
A bat infestation has never looked so good. This DIY Halloween wall decor idea involves creating a swarm of paper bats that look like they’re flying across your wall. You can make them surge out of a fireplace, flow up a staircase, or swarm around a doorway. It’s dramatic, creepy, and super cheap.
Styling Tips:
- Create a Flight Path: Arrange the bats in a swooping, S-shaped curve to mimic a natural flight pattern. Start with a dense cluster and have them spread out as they “fly” across the wall.
- Mix Bat Sizes: Use 2-3 different sizes of bat cutouts. The variation makes the swarm look more realistic and adds visual interest.
- Fold for Dimension: Lightly fold each paper bat in the middle to make the wings pop out. This creates a 3D effect that looks way better than flat paper.
Pro Tip: Use double-sided tape or wall putty to stick the bats to your wall. It’s strong enough to hold them but won’t rip the paint off when you decide to evict your new tenants post-Halloween.
#20. Spider Web Corner
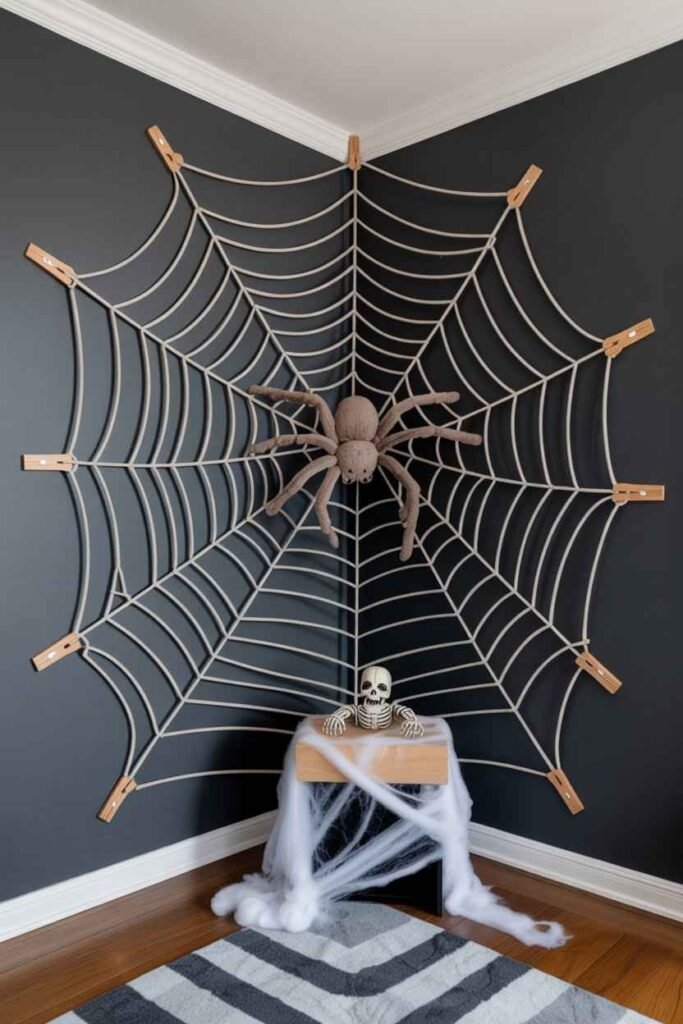
Got an empty corner that’s just begging for some spooky attention? Turn it into a giant, creepy spider web. All you need is some yarn and a few command hooks to create a massive web that stretches from wall to wall. It’s a simple concept that fills a space with major Halloween vibes.
Styling Tips:
- Add a Big Spider: A giant web needs a giant spider. Place a large, furry spider prop right in the center to be the focal point.
- Entrap Some Victims: Wrap a few small, lightweight skeleton props or cocoons made of cotton batting in the web to make it look like your spider has been busy.
- Use Different Yarn: While white yarn is classic, black or even glow-in-the-dark yarn can give your web a unique and extra-creepy look.
Pro Tip: Start by creating the main “spokes” of the web with yarn, securing them with hooks. Then, weave the circular parts of the web, starting from the center and working your way out. A dab of hot glue where the yarns intersect will keep it all in place.
FAQs
Time to Get Spooky
And there you have it—20 DIY Halloween wall decor ideas to get your creative (and creepy) juices flowing. The best part about DIY is that you can tweak these ideas to perfectly fit your space and your own personal brand of spooky. So pick a few favorites, put on a good horror movie, and start crafting. Happy haunting!

I am Mindy Medford, a home décor, paint, and design specialist with over a decade of hands-on experience transforming ordinary spaces into cozy, personality-packed havens. Since 2013, I have been helping homeowners discover the art of beautiful yet practical design. I share my love for color, texture, and layout—making stylish interiors & exteriors feel achievable for everyone. Whether it’s picking the perfect paint shade or reimagining a small space, I’m here to guide and inspire.